This article is the third part of a three-part tutorial on getting started with OpenSports tournaments.
It is assumed that you have already completed Part I & Part II meaning you have already created a tournament, set up registration options, have teams registered, and created the round robin schedule.
In the article, we’ll walk you step-by-step on how to set up an elimination bracket and knockout round matches.
Let’s begin!
0. Before we start
Please confirm you have access to all of the following. If not, please revisit Part I & Part II of the tutorial.
A) Existing upcoming tournament
B) Teams registered
- The tournament should have most, if not all, teams registered before you set up the round robin schedule
1. Creating an elimination round/playoffs
Note: Right now, OpenSports only supports single elimination playoffs/tournaments.
A) Select the amount of teams that go through
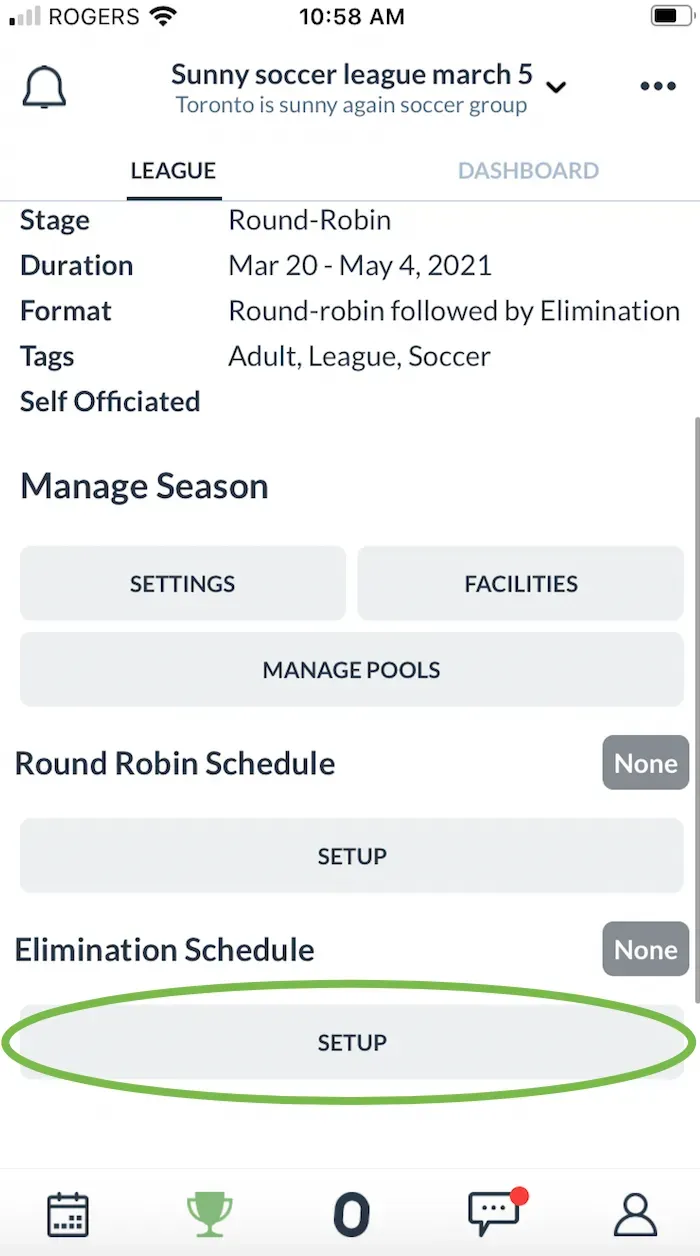
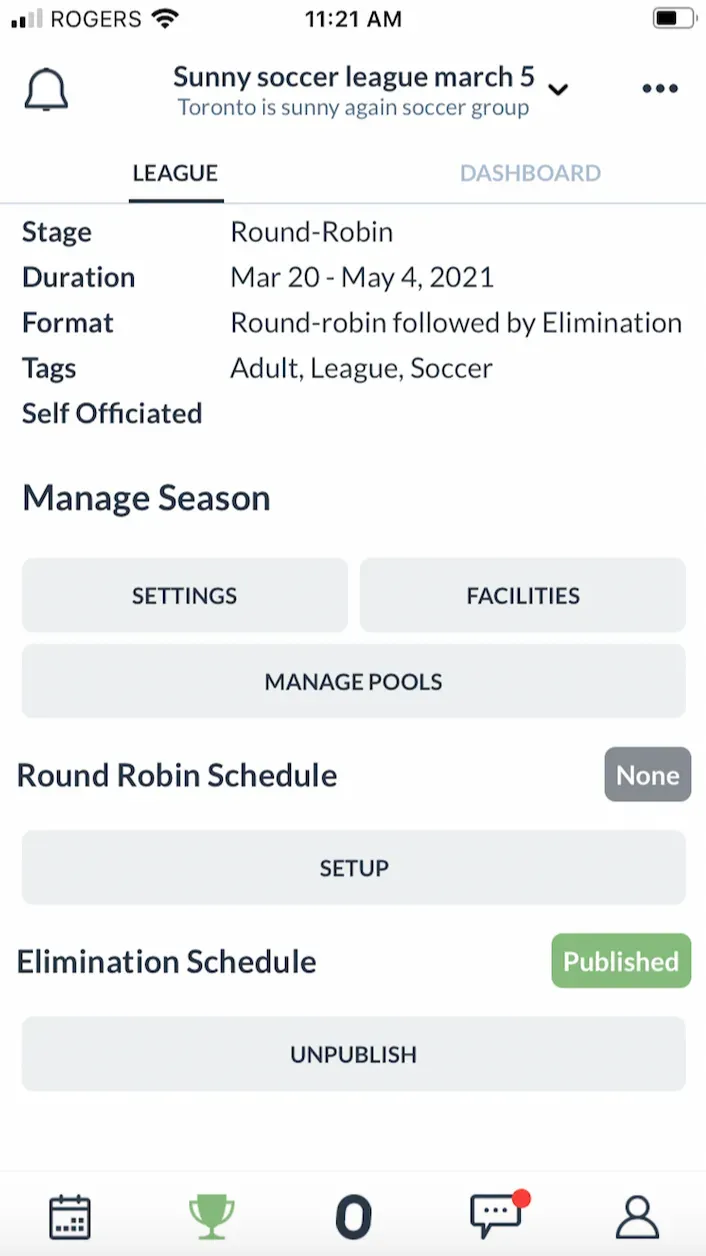
- From the League page, under Elimination Schedule, tap Setup
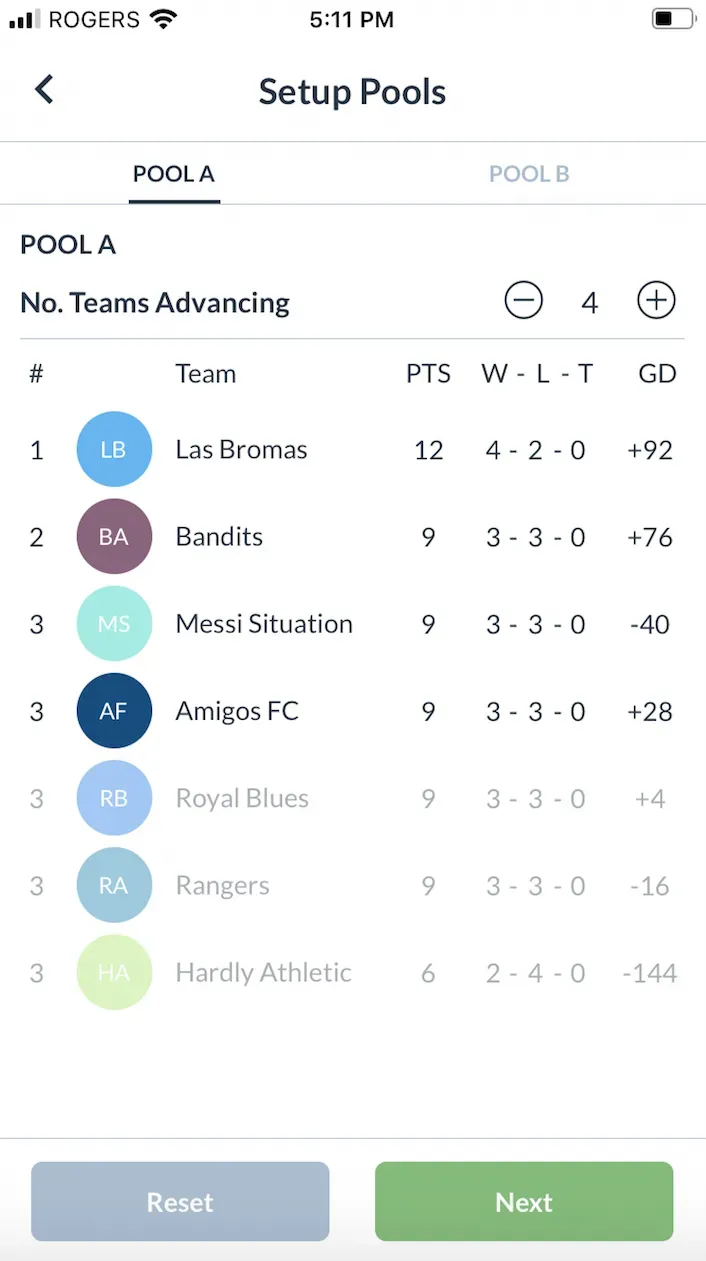
- If you have pools, you can select how many teams per pool can enter the elimination round
- You can press +/- buttons to increase or decrease the number of teams per pool that can enter the elimination round
- By default, the system selects the top teams from the standings, however you can easily drag and drop teams into different positions
- If there are pools, select the teams that are going through for the second pool
B) Match Info
In the Match Info page, specify the duration for each match, the time between matches, and if there will be a 3rd place (“consolation”) match.
- By default, the system will automatically create the amount of elimination matches based on the amount of teams you selected to be in the elimination bracket.
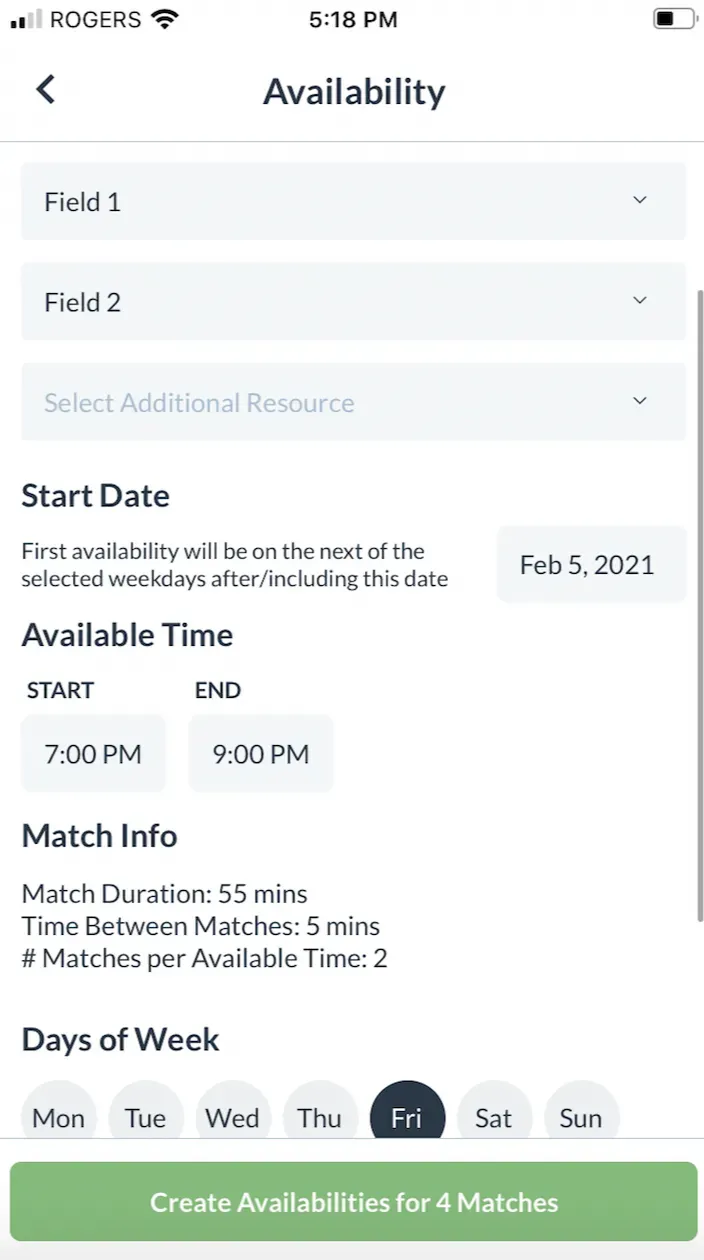
C) Create the schedule / Add available time slots
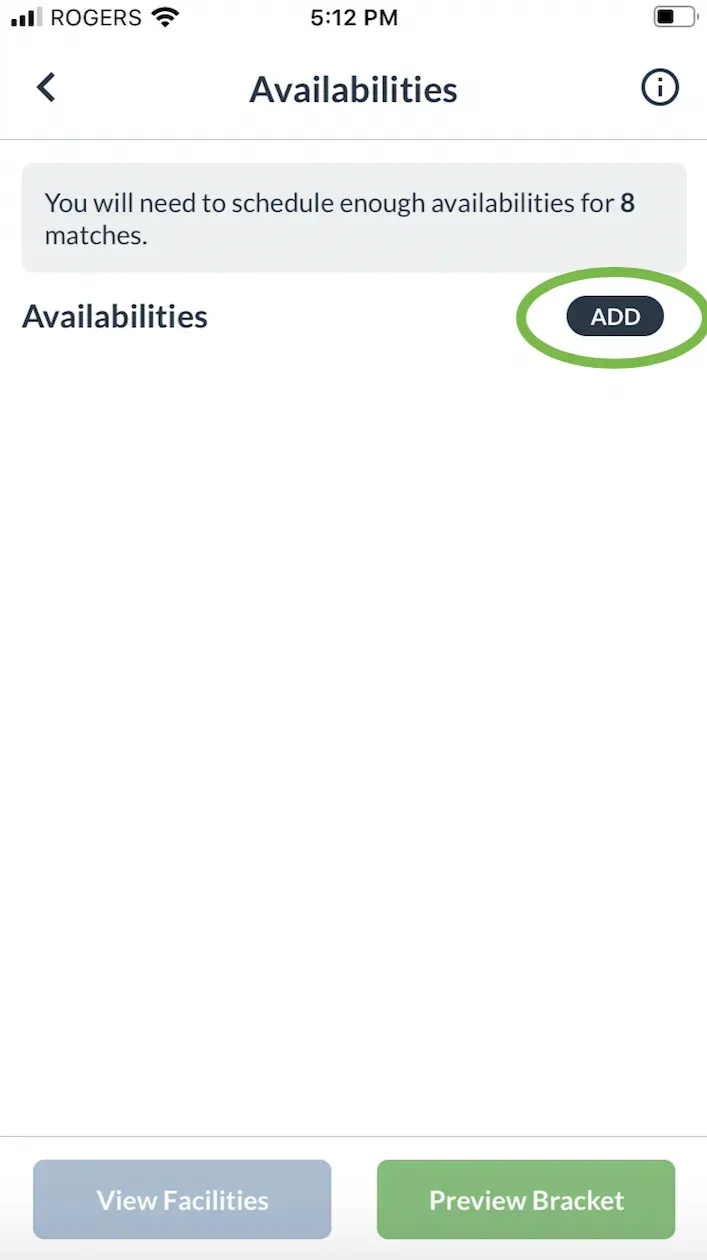
Based on the number of teams, number of pools, and match durations, the OpenSports system automatically calculates the total number of matches for the elimination round. In this step, you need to specify enough available time slots for all these matches so the OpenSports system can automatically assign each match to an available time.
There are two options: specifying available time slots manually or setting up a recurring schedule. For this tutorial, we’ll add a recurring series of time slots.
- From the Availabilities page, tap “Add” to start adding time blocks for your matches and select “Recurring” or “Manual”
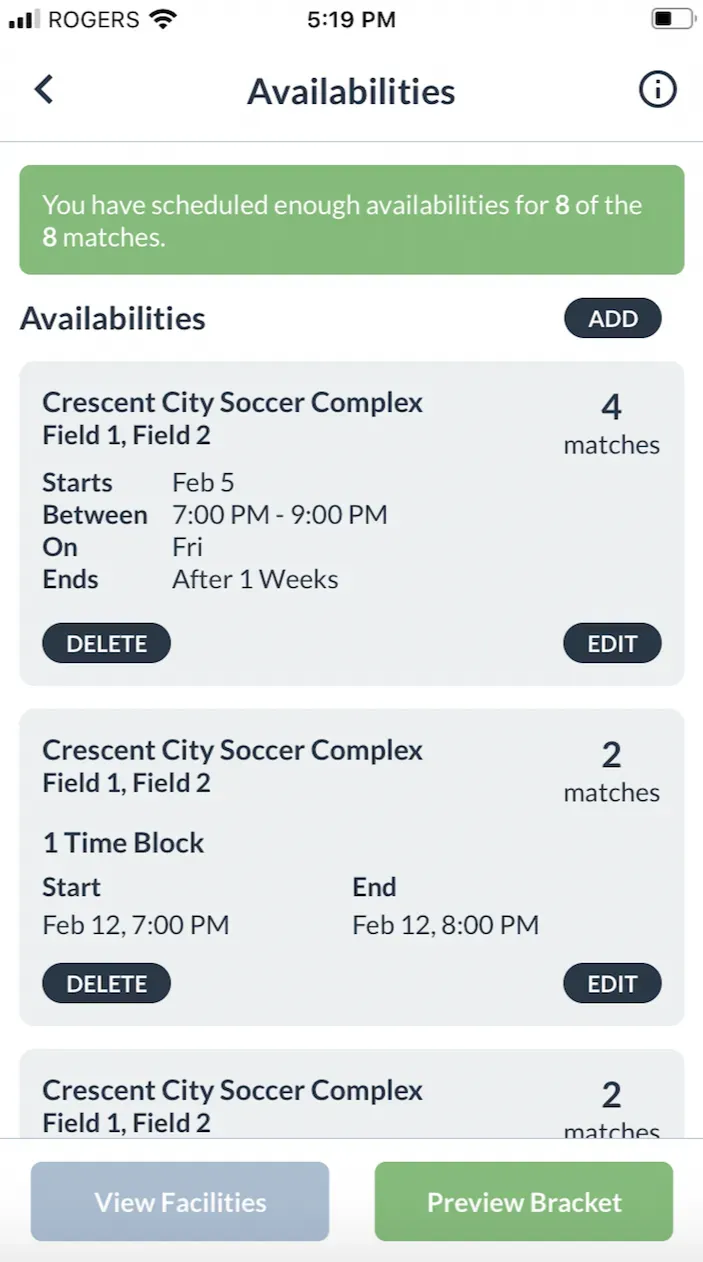
- Specify Facility and Resource(s) — you may need to create a new facility with resources if required. Facilities are created and shared for your entire group
- Add all of the time blocks you have booked, until it matches the amount of matches there are in the playoffs.
- Repeat steps 1–3 as necessary until you have created enough available time slots for all your matches
- Once you have added all of your field availabilities, tap on Preview Bracket.

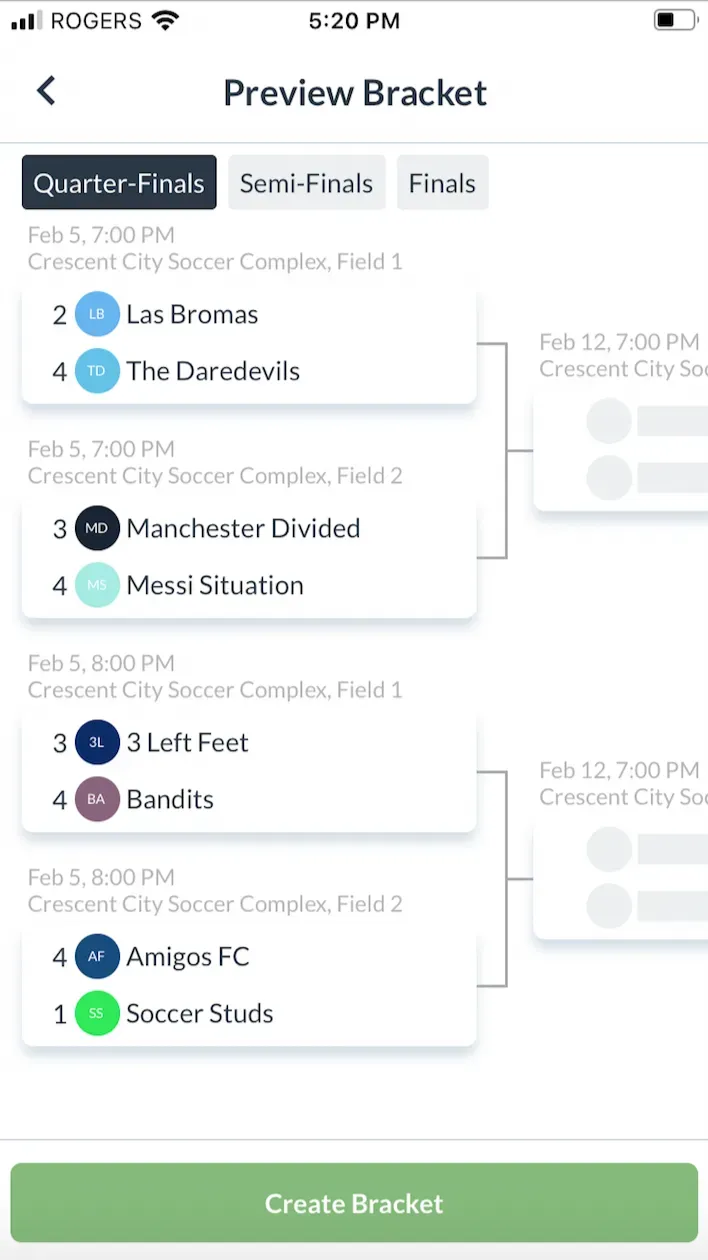
D) Preview the bracket
You are going to loooove our preview bracket tool!
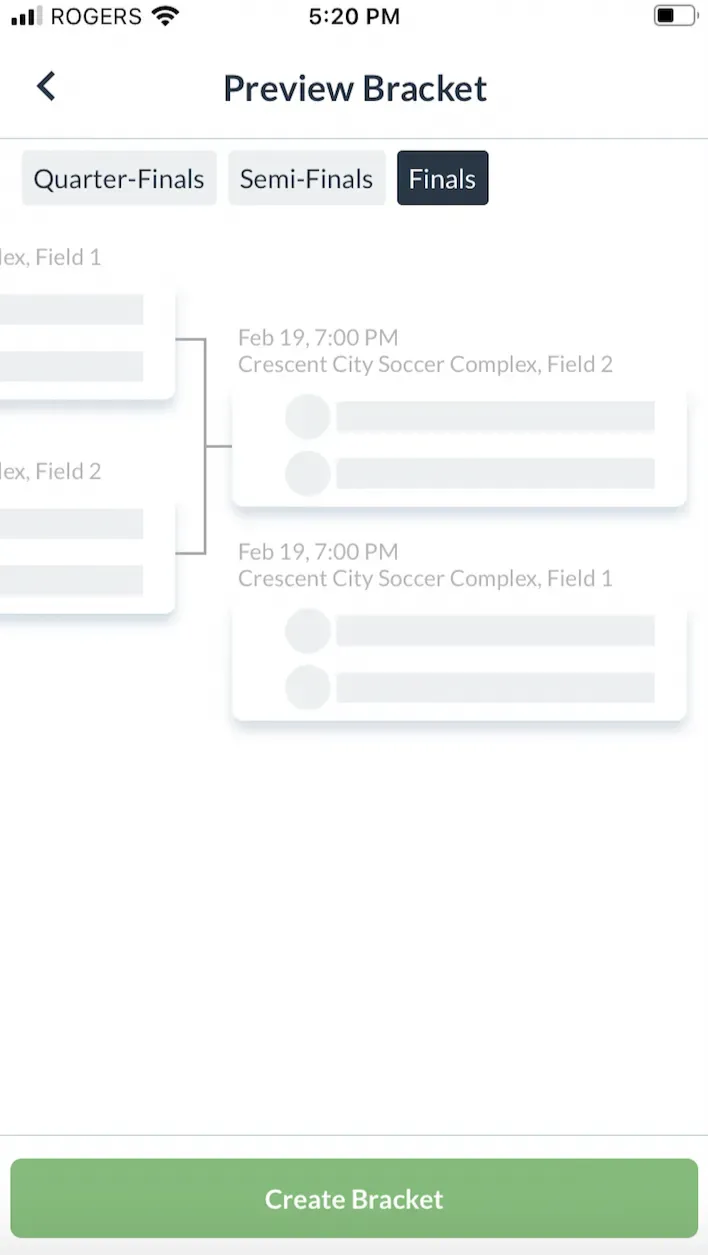
- Watch the brackets expand and collapse as you scroll between rounds (i.e., quarter-finals, semi-finals ,finals) or just tap on the different rounds to quickly jump to the bracket.
- Make sure the dates/times/locations are accurate
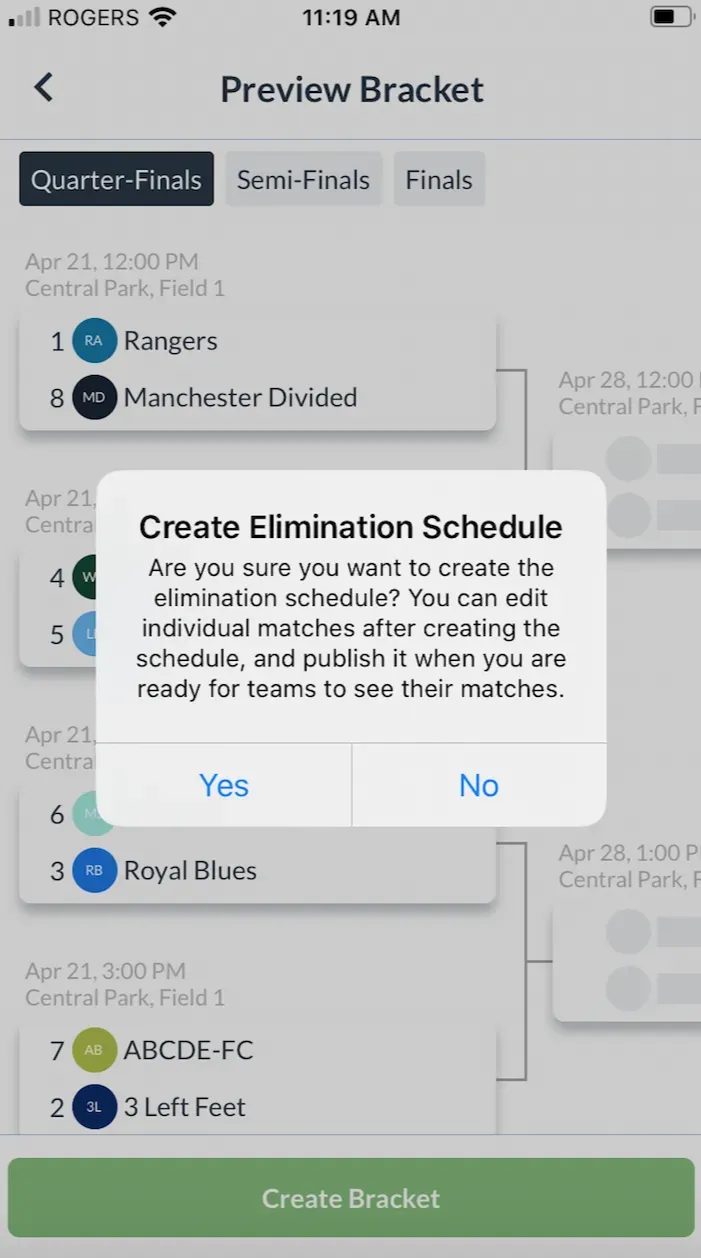
- If you are happy with how everything looks, tap on “Create Bracket” ,and you will see a “Create Elimination Schedule” warning. Tap “Yes”!
E) Review and Edit matches
One key benefit of the “unpublished” state is admins can review the whole match schedule and make edits. Once the schedule is published, the admin can still make edits to specific matches, but notifications will be automatically sent to players (e.g. if match times are changed).
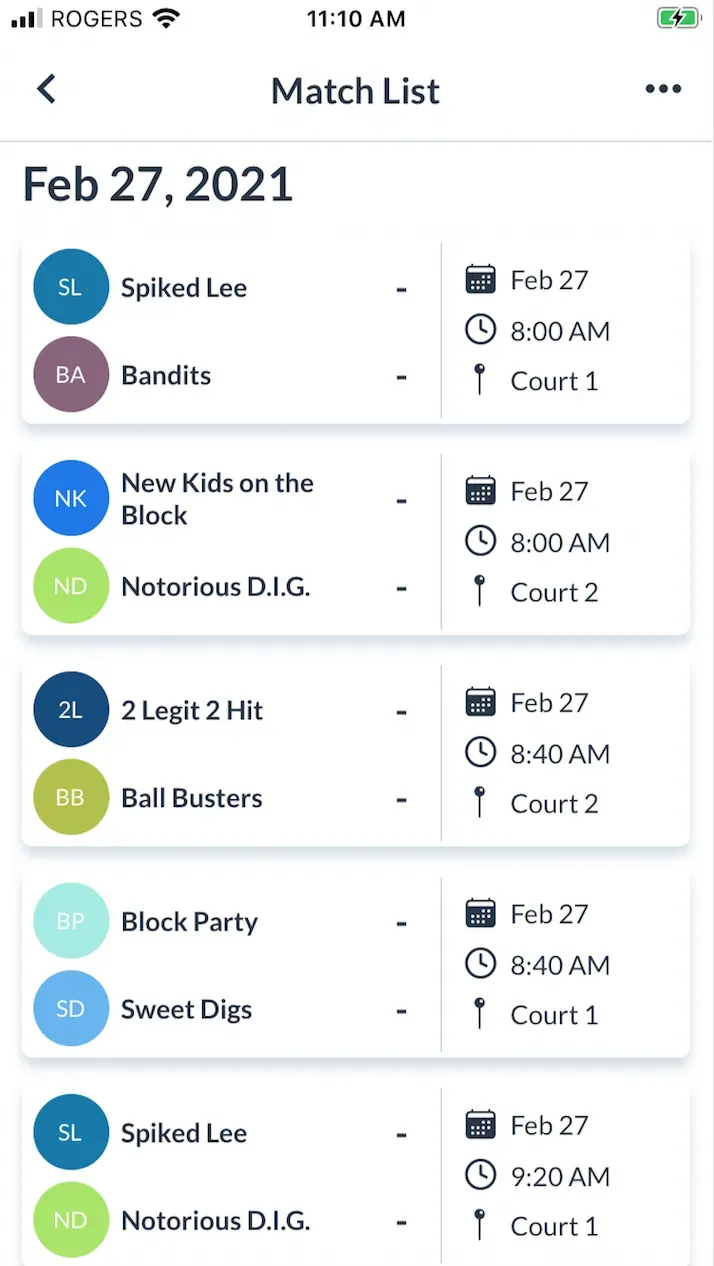
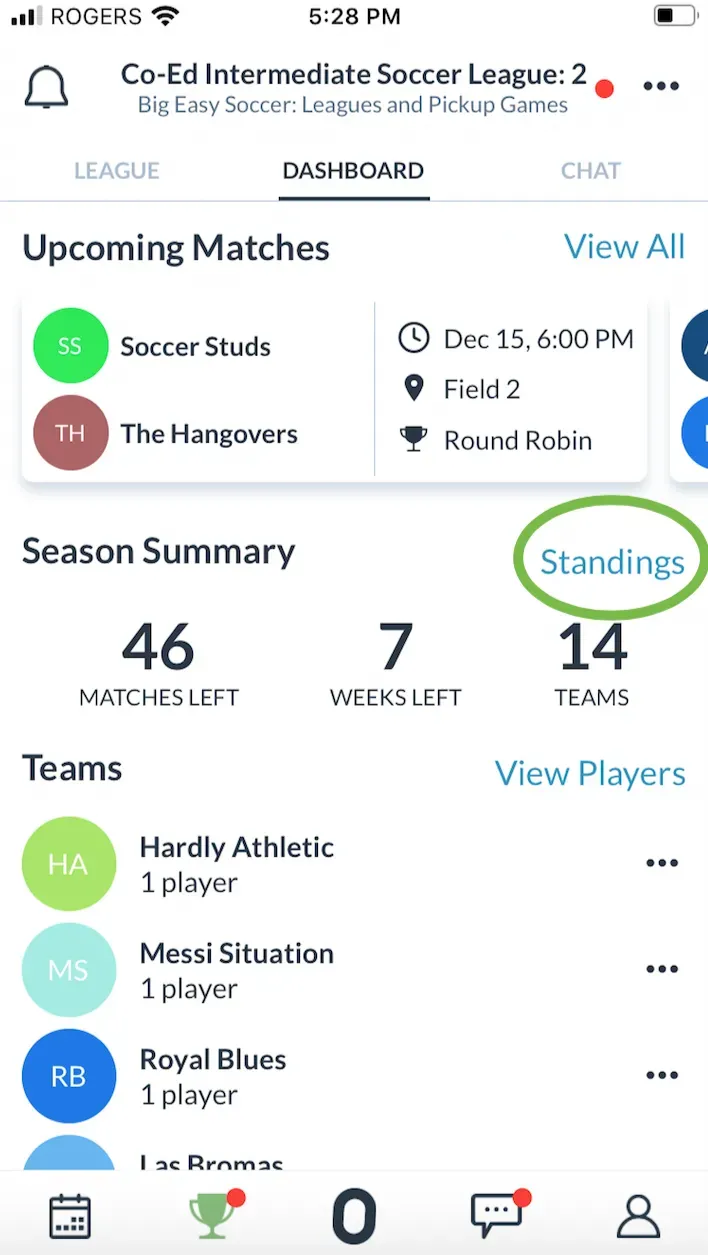
To view the whole list of matches, simply tap on “View All” beside Upcoming Matches in the Dashboard page.
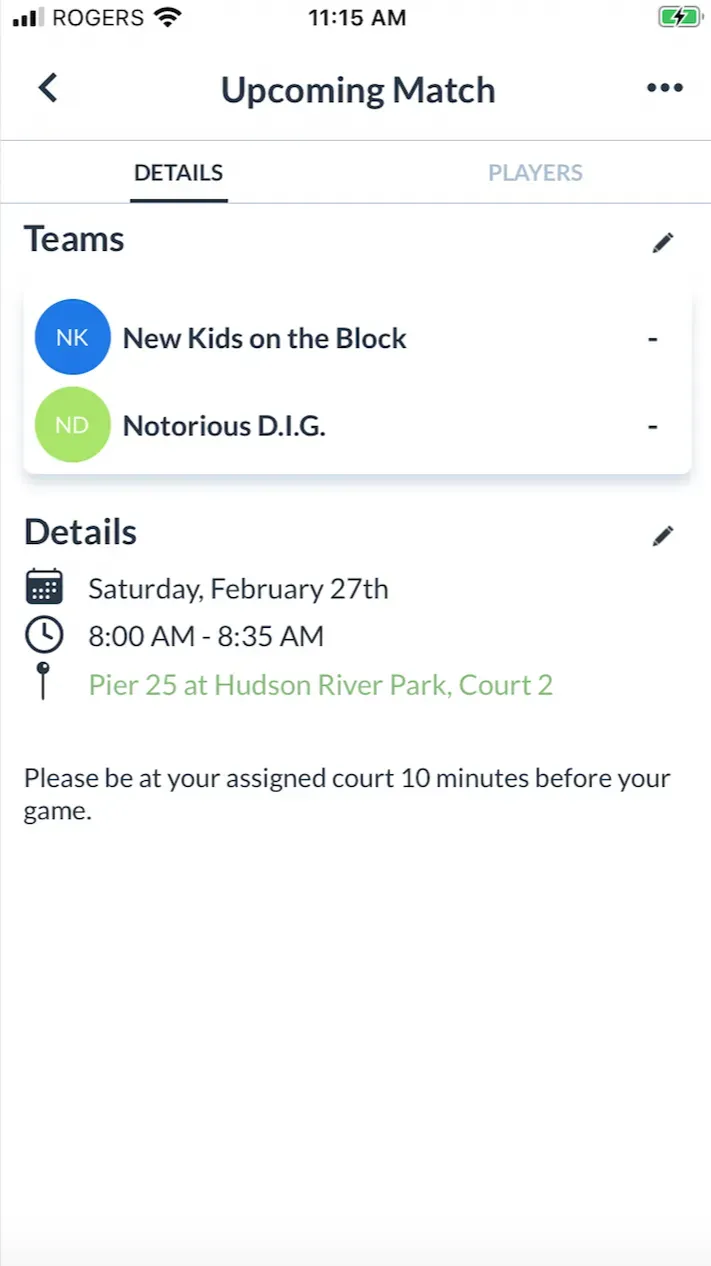
On the Match List page, you’ll see the list of all matches sorted by date. Tap on any given match to view more details.
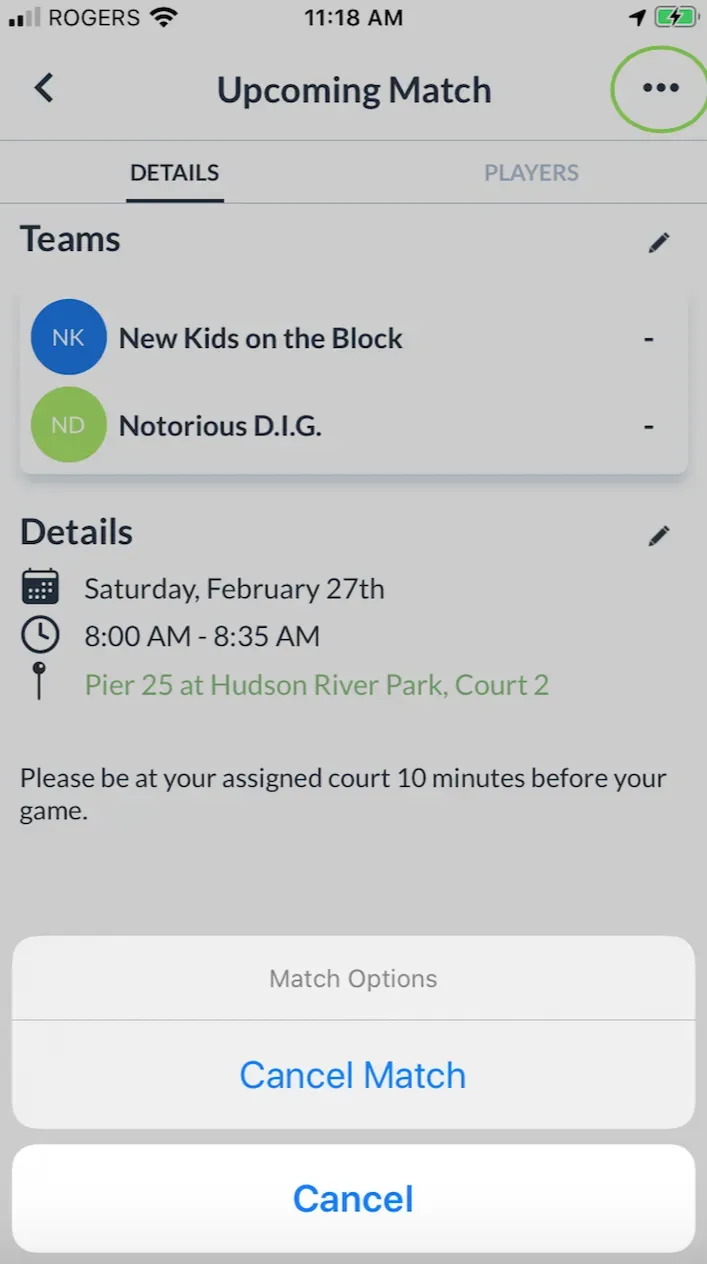
OpenSports makes it easy to edit a match:
- To cancel the match, tap on the ellipsis (…) on the top right corner
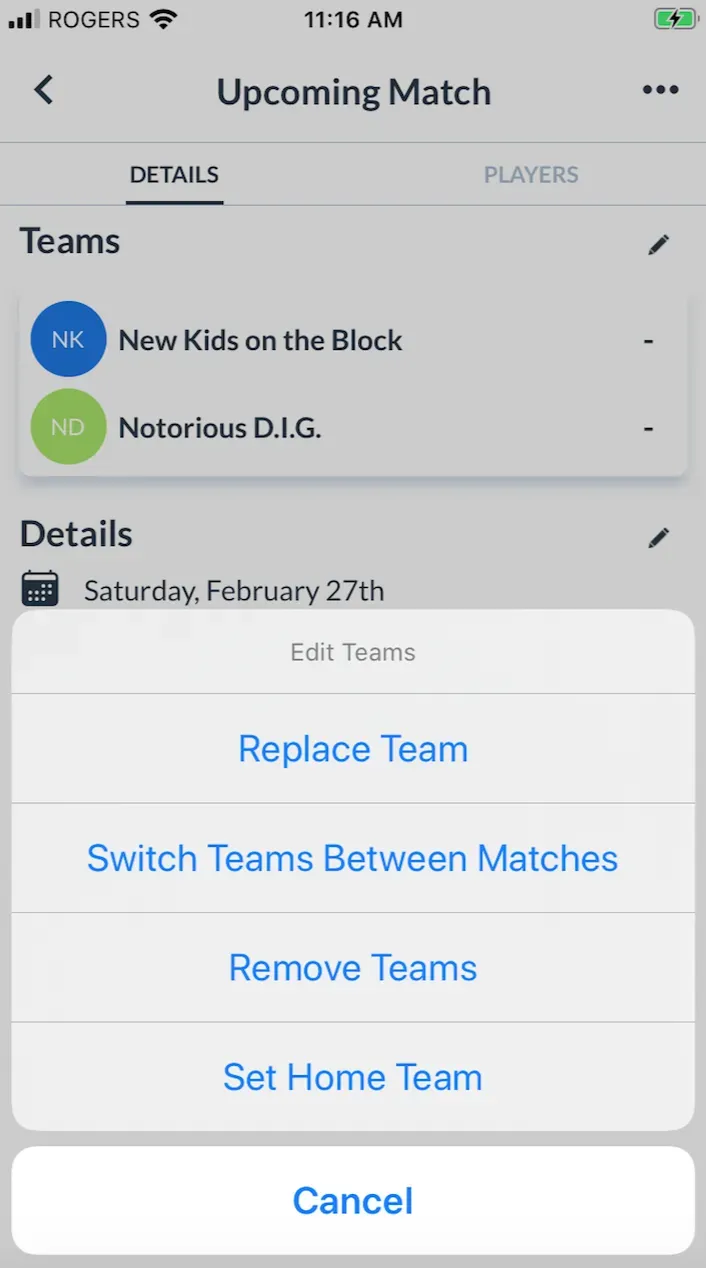
- To replace, switch, or modify teams, tap on the “Pencil” icon to the right of “Teams”
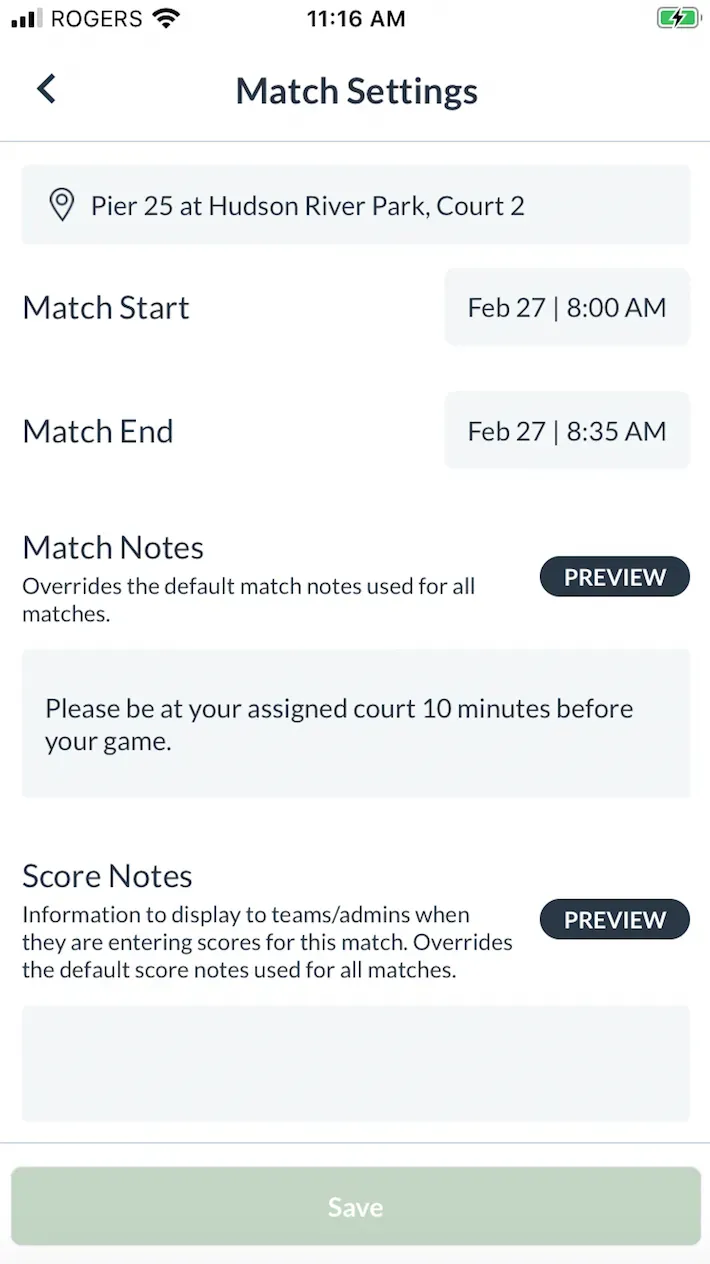
- To edit match details (location, times, etc.), tap on the “Pencil” icon to the right of “Details”
F) Review the bracket
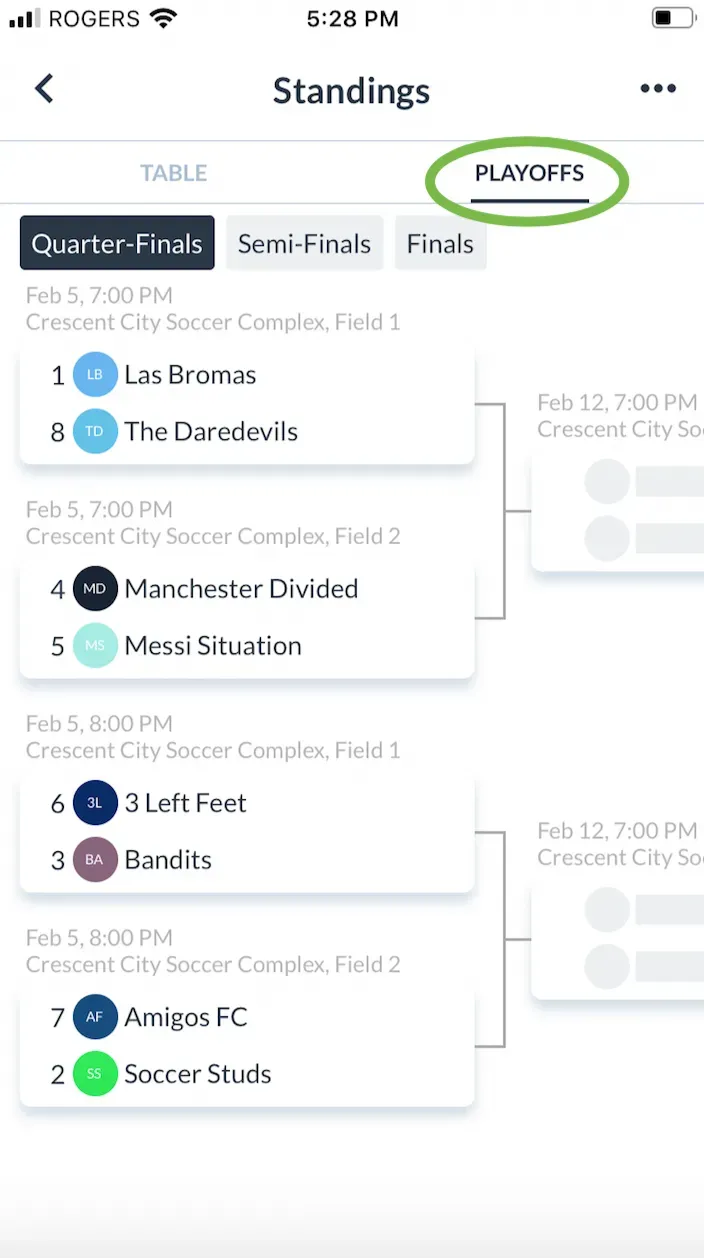
- Before publishing the elimination schedule/bracket, you can view the bracket again by taping on “Standings” beside Tournament Summary in the Dashboard page.
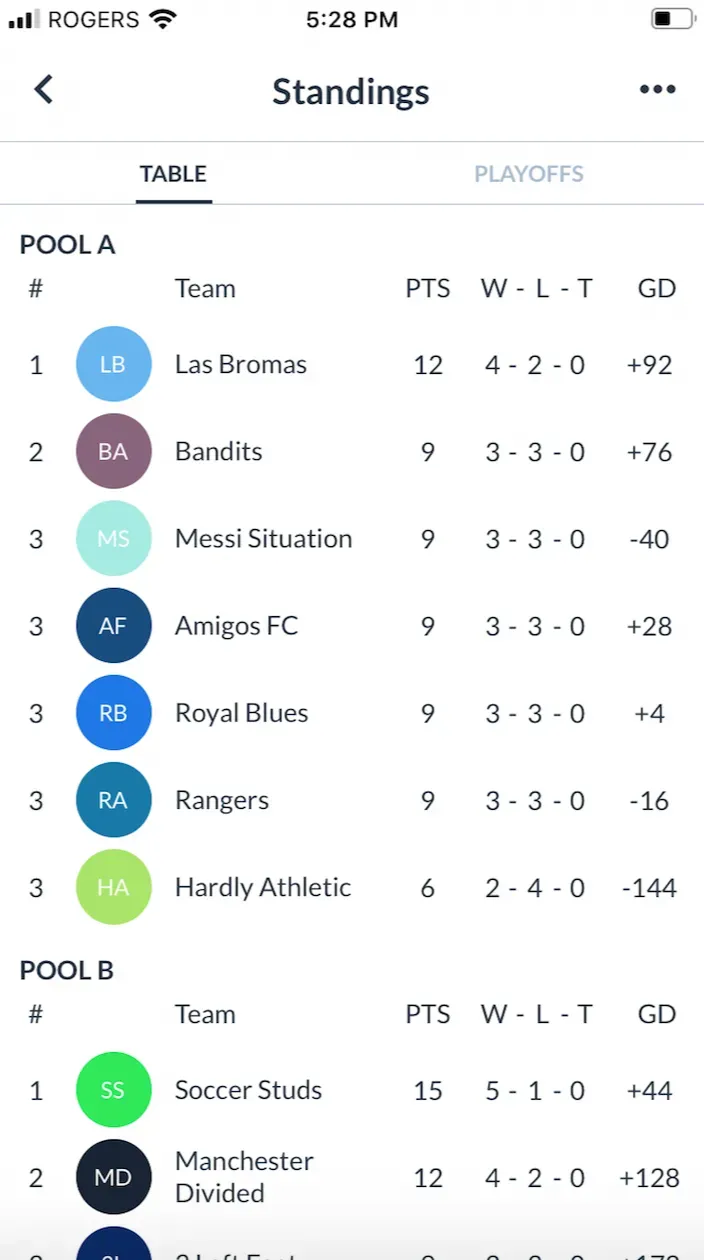
- Tap on the “Playoffs” tab to view the bracket.

G) Publish the Elimination Schedule
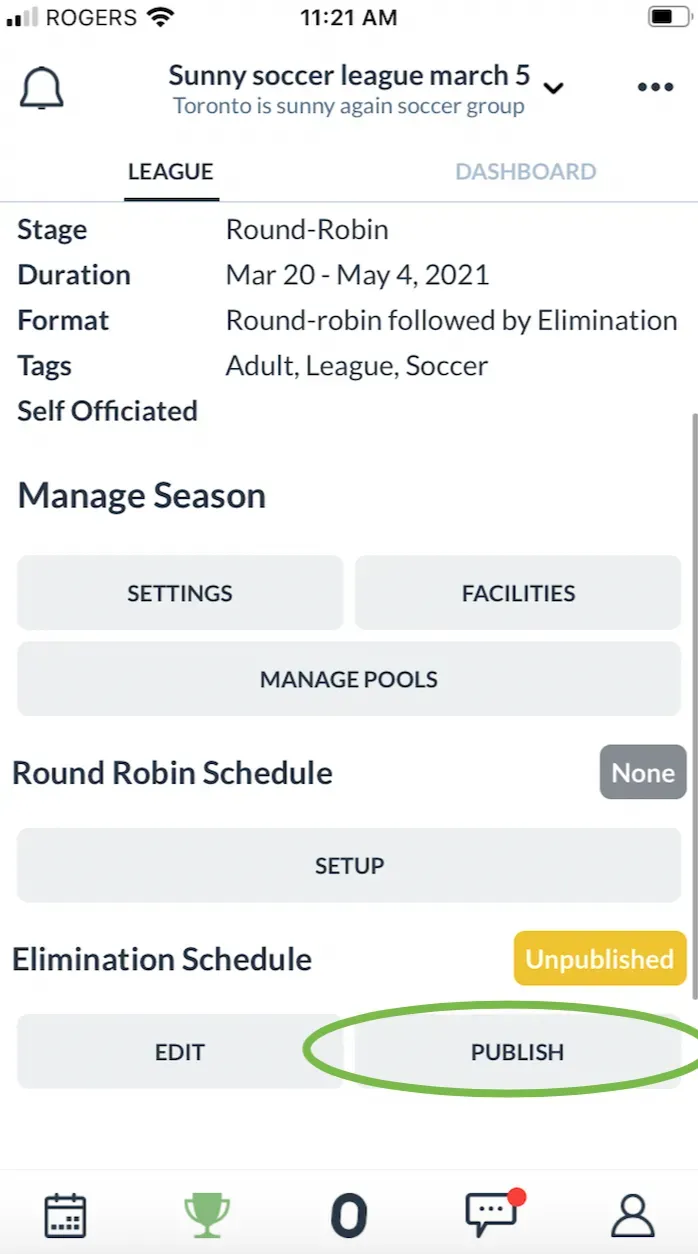
- When you’re happy with your schedule of matches, navigate back to the tournament admin page, and tap “Publish” under Elimination Schedule.
- Once the schedule is published, all registered players will receive a notification to check out their new match schedule!

H) Live bracket updates
- In order to view your playoff bracket during the tournament, click on the Standings button from the Dashboard.
- Tap on the “Playoffs” tab.
- Once teams play and scores are filled in, the playoffs bracket will automatically update and propagate to everybody’s device!!
- Note: Results from matches in the Elimination/playoff round do not affect round robin standings. Matches in the Elimination/playoff round do not get their own standings table.


Voila! Hope you enjoyed our simple elimination/knockout/playoff creator tool! It really will make you smile :)
Questions? Send them our way: support@opensports.net