OpenSports' flexible discounts feature lets you get creative with your discounts to incentivize registaration, run promotional campaigns, and reward your members. To set up and manage discounts, you must be setup as a group admin (see how to assign admin roles here).
Discount Features
- Discounts can be set to a fixed monetary amount or a percentage of the total price (e.g., $5 off vs. 50% off).
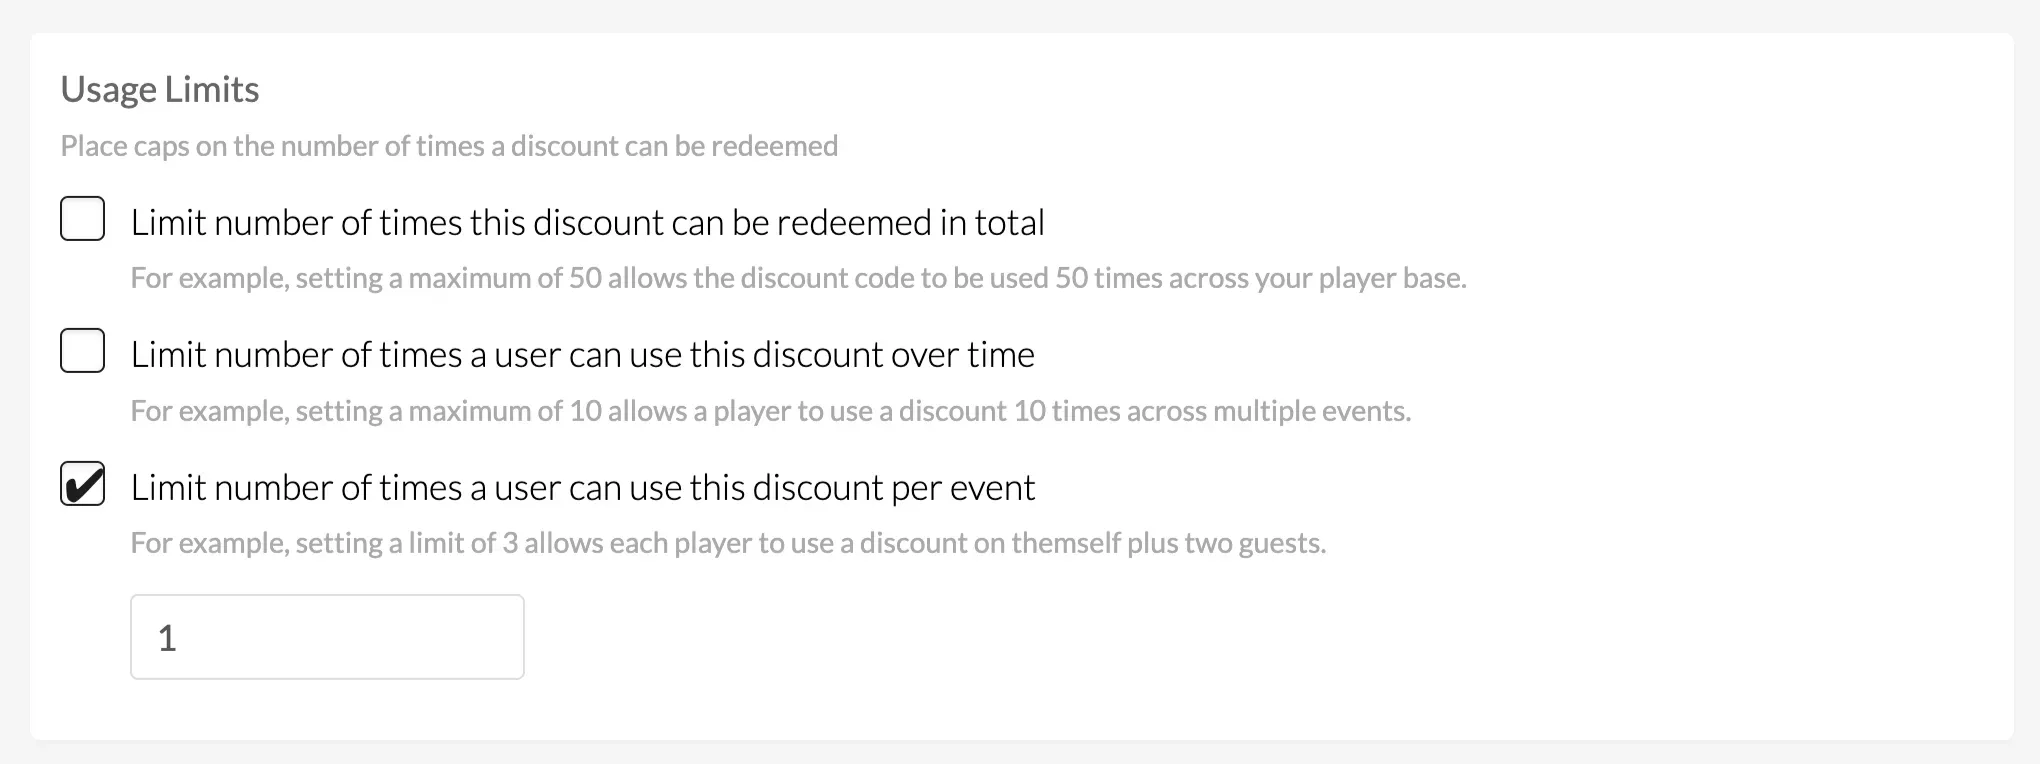
- Usage limits place caps on how many times a specific discount can be redeemed:
- Limit total # of discount uses: set limits on how many times a specific discount can be redeemed across all of your group activities.
- Limit # of discount uses per member: set limits on how many times a group member can redeem a specific discount across all of your group activities.
- Limit # of discount uses per activity: set limits on how many times a specific discount cab be redeemed for a single activity/ event.
- Restrict discounts to specific group members or group activities.
- Discounts can be limited to a specific duration (e.g., a 1-week promotional discount).
- You can apply discounts automatically or choose to manually distribute a discount code to your group members.
How to set up automatic and manual discounts
- Navigate to your group Dashboard from your group home page.
- In the left-hand menu, click on Discounts.
- Here you can view all existing discounts. You will also see the admin and staff discounts that are built in to the OpenSports platform here.
- To filter active vs. internal (i.e., not editable) discounts, click on the respective buttons in the top right corner.
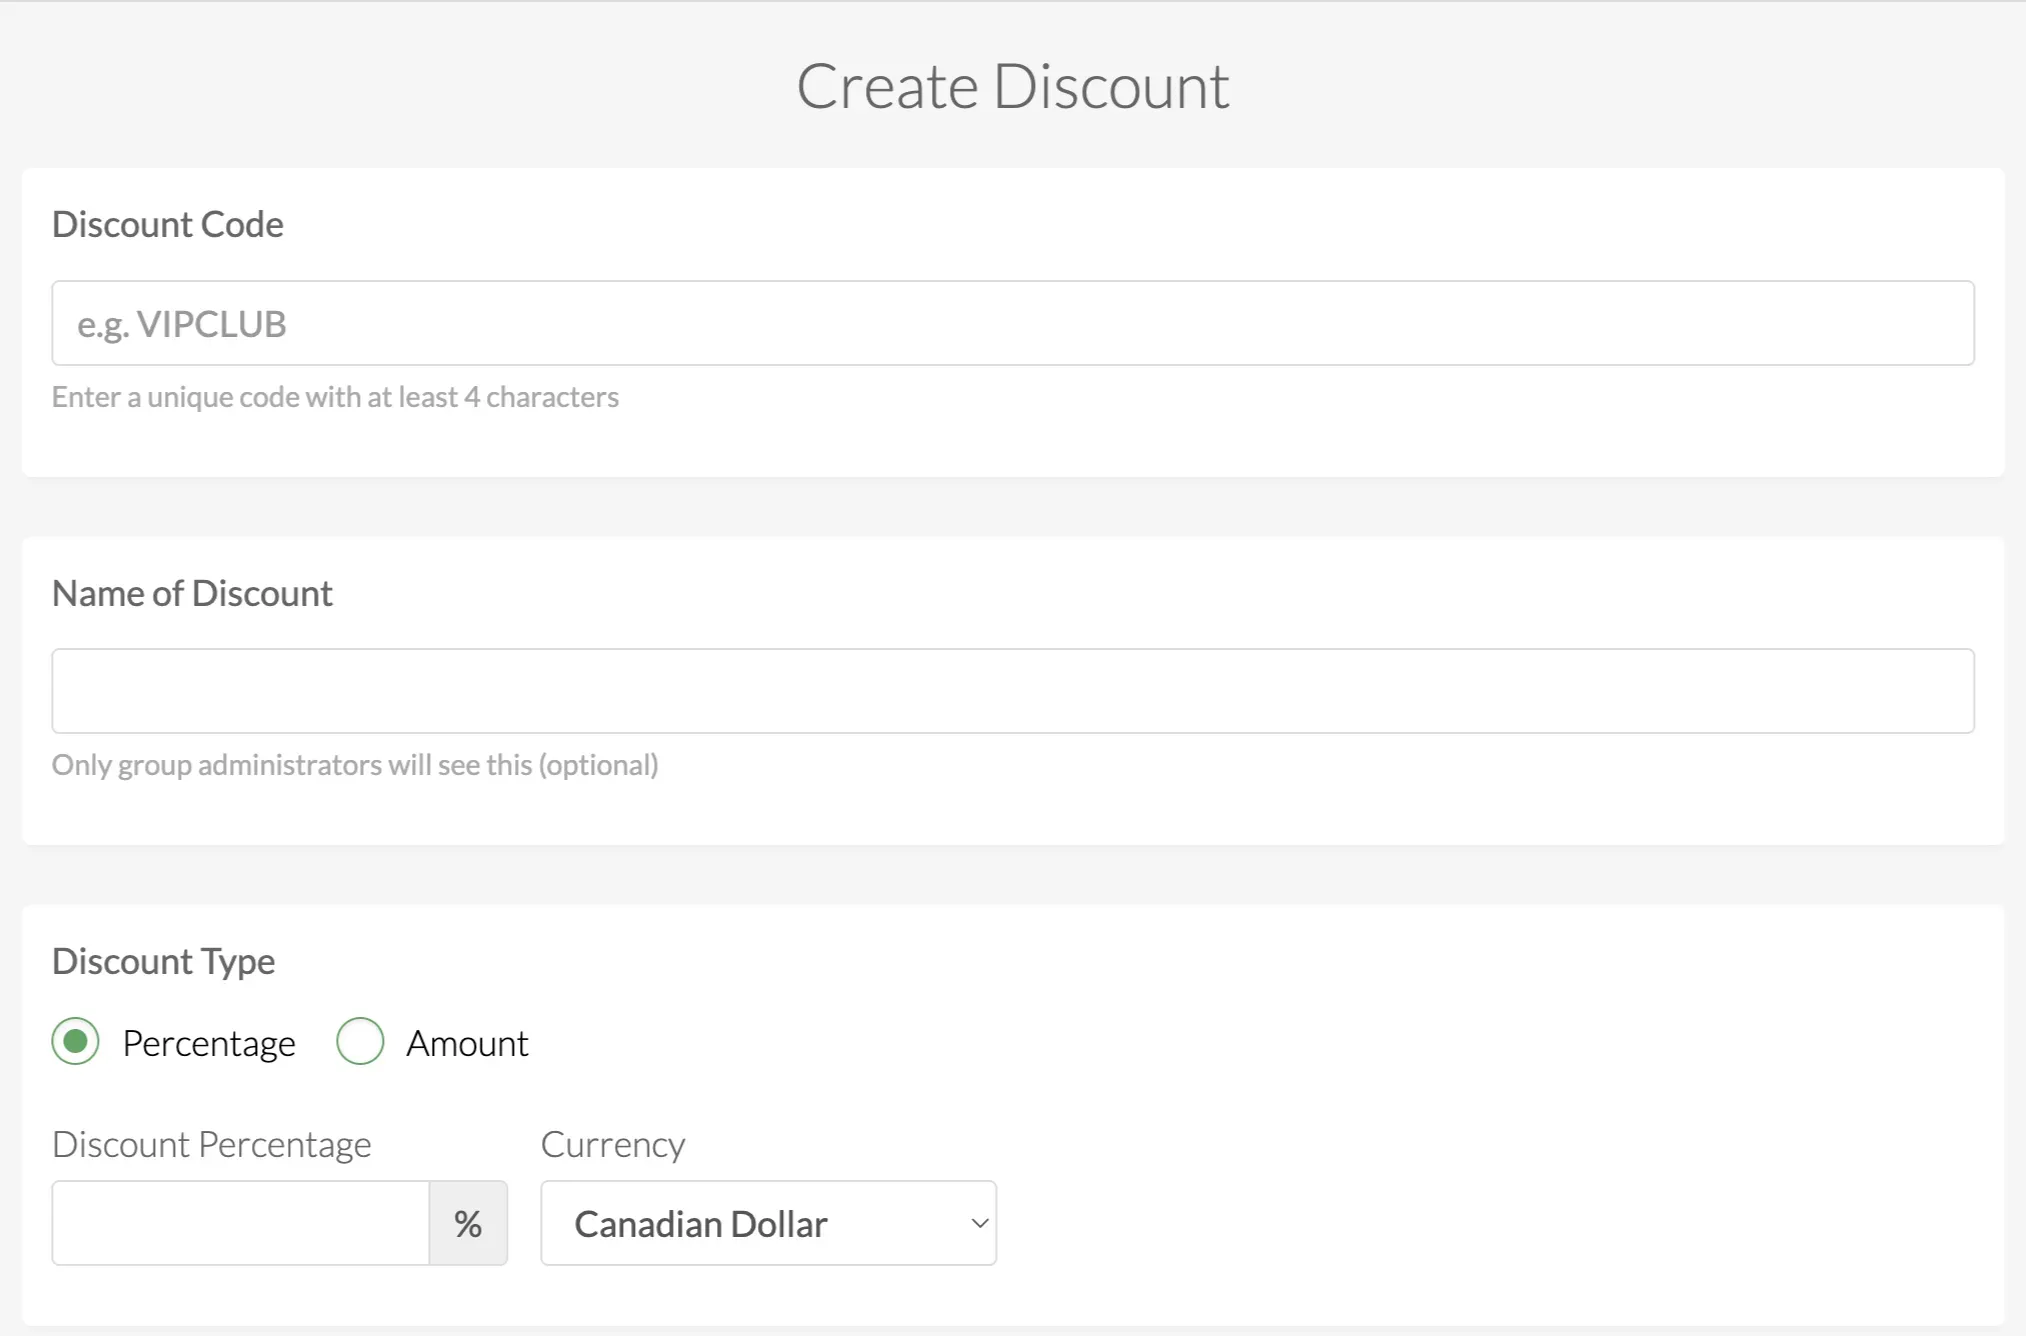
- To create a new discount, click on Create Discount.
- Enter the Discount Code. This is the unique discount code and must have at least 3 characters. If you share your discount code manually with members, this is the code you will share.
- Enter an optional Name of Discount. This is only visible to group admins and provides additional descriptive information about the discount.
- Select the discount type by clicking on the respective buttons.
- Percentage: enter the % off the discount offers.
- Amount: enter the dollar amount off the discount offers.
- Select discount currency from the dropdown menu.
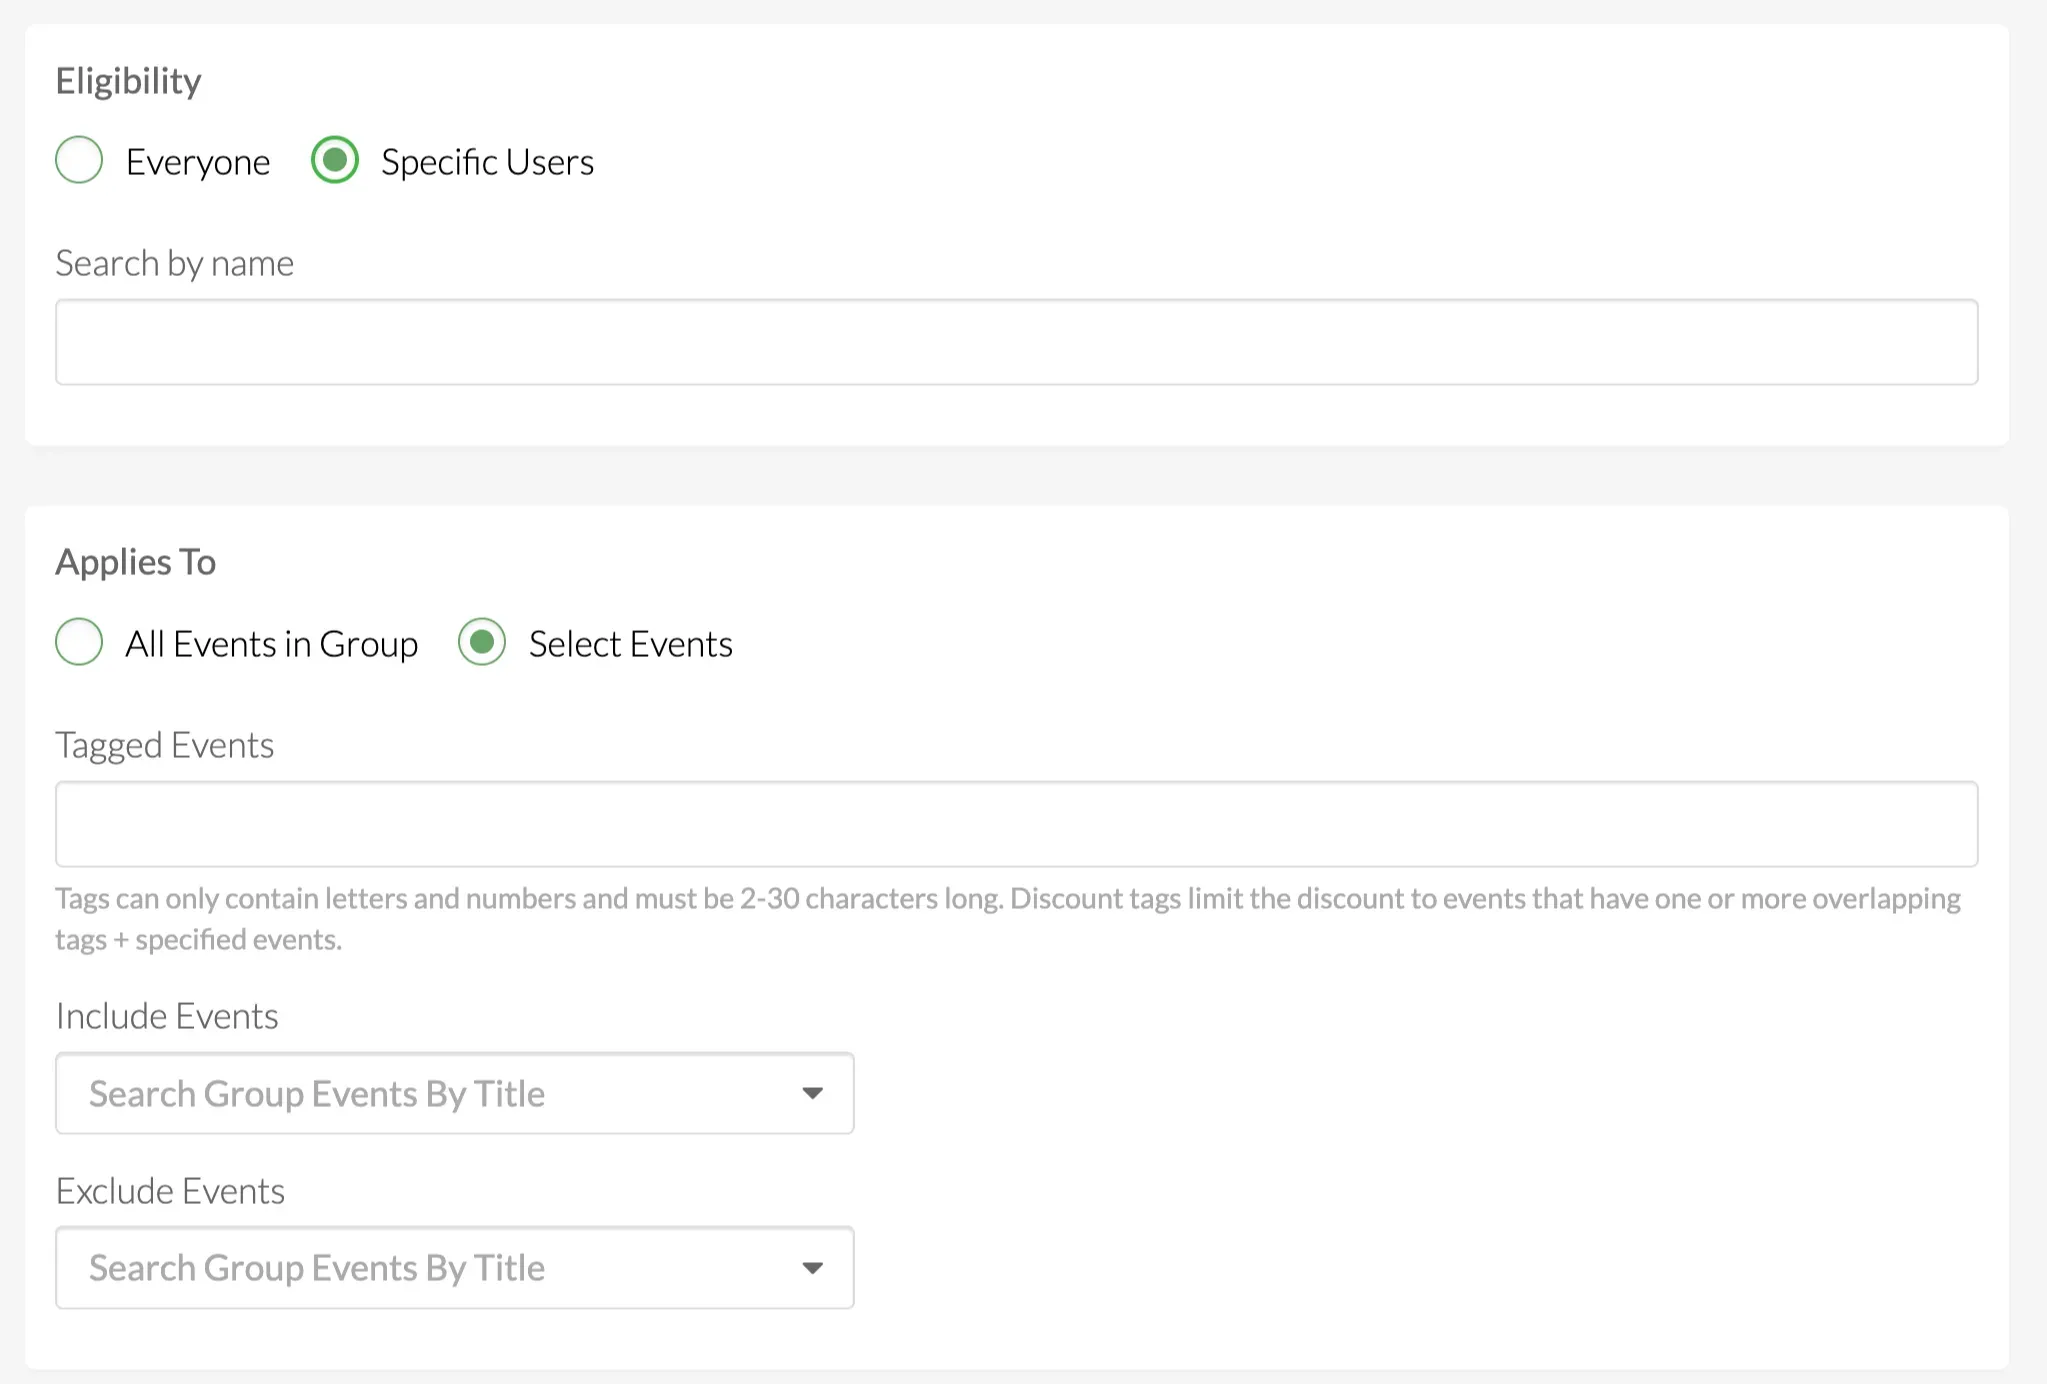
- Select discount Eligibility by clicking on the respective buttons.
- Everyone: allows any members joining your activities to redeem the discount.
- Specific users: restricts discount use to the specified users. Search for individual users by name.
- Select whether the discount applied to all events created within your group or to select events.
- For Select Events, you can choose if specific events are included or exlcuded from the discount (search by title). You can also search for event tags to include a group of tagged events in the discount. Read more about event tags here.
- Set Usage Limits based on your needs.
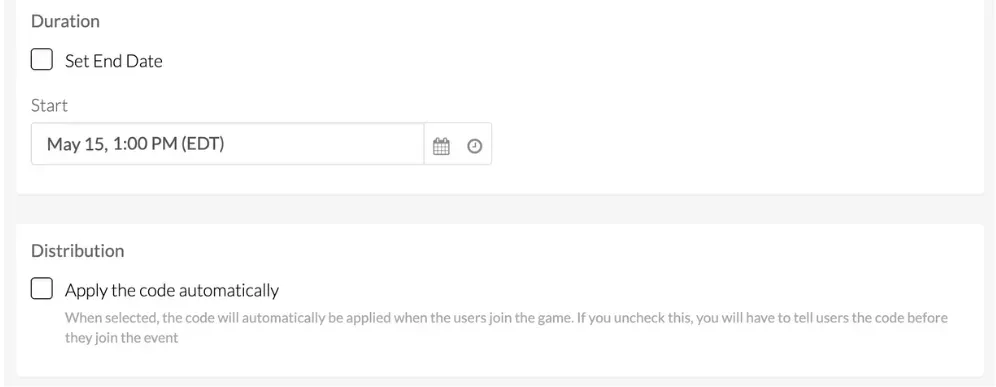
- Set discount Duration by selecting the discount start date. By default, no end date is set. To set an end date, check the Set End Date box and enter discount end date (i.e., date and time when discount becomes inactive).
- To automatically apply the discount you just created when a member registers for an event, keep the Apply the code automatically box checked.
- Uncheck the box to stop automatically applying the discount code at event registration.
- If you choose to distribute the discount code manually, you must share the code with your members before they register for events. Each user will have to manually enter the discount code at checkout.
- Review the summary of your discount and click Save.
Related Articles
- How to use Discounts Reports to track discount and membership performance
- Create an early bird discount to increase signups
- How to limit discounts to specific events -How to Create Trackable Discount Links for Ads and Promotions
That's it!
Are you on the Full Time or Premium subscription? Learn about annual memberships here!
Questions? Send them our way: support@opensports.net