Three easy steps to make the transition simple!
Create your first event! (We recommend you create at least one upcoming event before inviting members to your group, so that they can see that there is upcoming activity!)
Invite everyone on your email list to your group directly from the OpenSports website.
OR just email your members with the link to join your group (the link to your group was given to you in the email you received when you created your group)
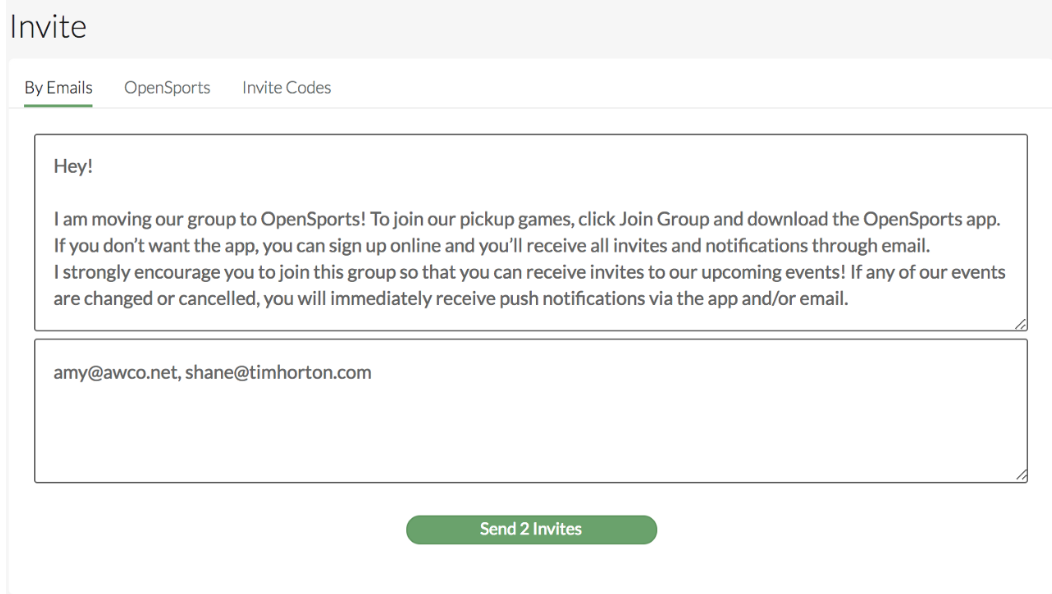
How to send email invites to your group through OpenSports: Go to your Group’s home page> Under the Invite tab, click By Emails. You can add as many emails as possible in the text box, separated by commas or by pressing enter.
- If you use other platforms as well: Continue to make announcements about your next few events on Facebook (and other platforms you’re using)
- Continue to post your events on platforms like Facebook, but attach the link to your OpenSports event so that players know that they MUST join through OpenSports!
- give a clear indication that you will be using OpenSports as the exclusive platform to collect RSVPs and payment!
Check out this document for some examples of text you can copy and paste in your emails!
We have created a very helpful how-to section here for help on more specific topics such as the waitlist, refunds, waivers, sending event invites, etc.
Have fun!!
Questions? Send them our way: support@opensports.net