This article is the third part of a three-part tutorial on getting started with OpenSports tournaments. It is assumed that you have already completed Part I & Part II meaning you have already created a tournament, set up registration options, have teams registered, and created the round robin schedule.
In the article, we’ll walk you step-by-step on how to set up an elimination bracket and knockout round matches.
Let’s begin!
1. Creating an elimination round/playoffs
Note: Right now, OpenSports only supports single elimination playoffs/tournaments.
A) Get Started
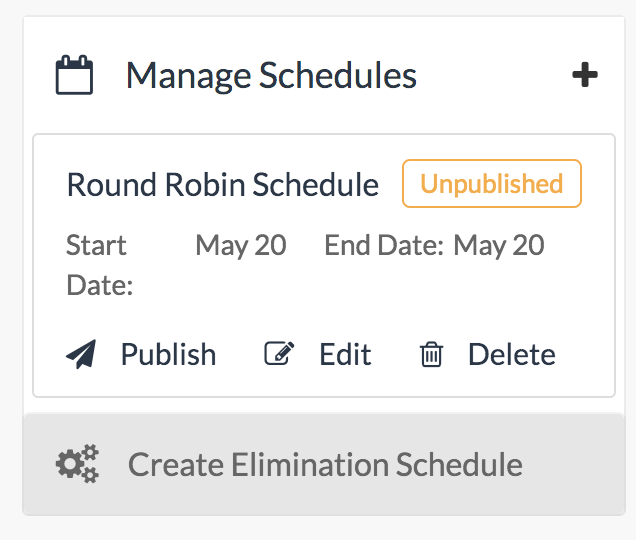
- From the Tournament page, under Manage Schedules, click Create Elimination Schedule
B) Schedule Details & Match Info
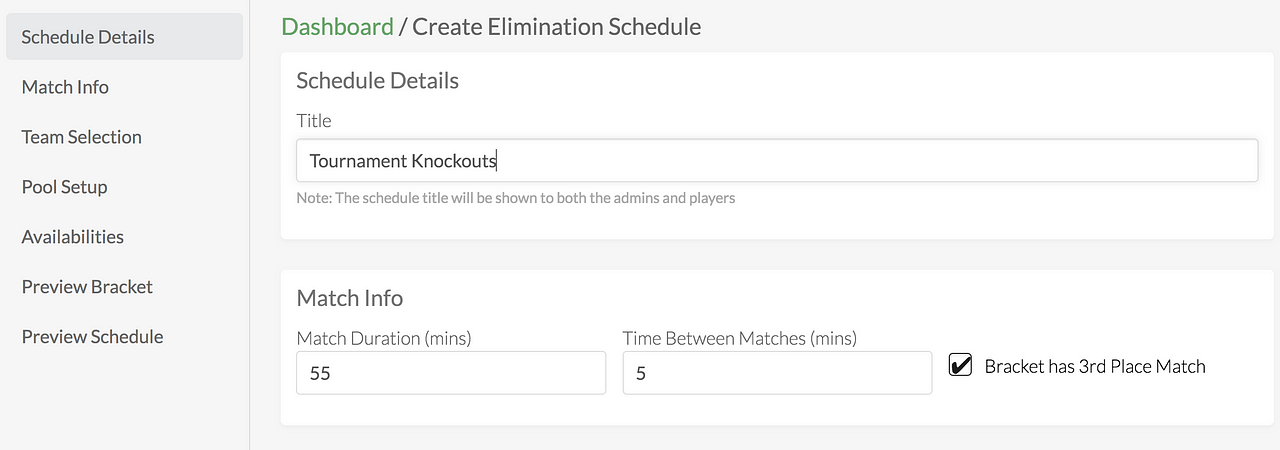
- Schedule Details — You can give your schedule a title, like “Knockout Round”
- Match Info — specify the duration for each match, any breaks between matches, and if there will be a 3rd place consolation match. If you have pools, you can select how many teams per pool can enter the elimination round
C) Team Selection
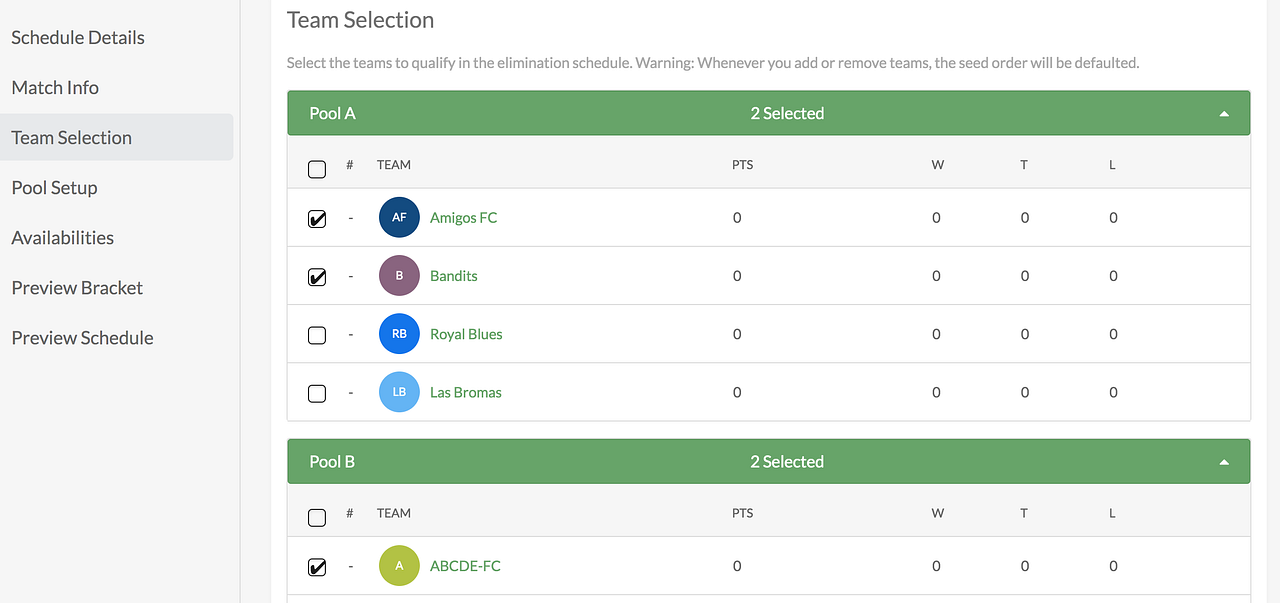
- Select the teams to qualify in the elimination schedule. Warning: Whenever you add or remove teams, the seed order will be defaulted.
- By default, the system selects the top teams from the standings, however you can easily drag and drop teams into different positions
- You can select the checkboxes to increase or decrease the number of teams per pool that can enter the elimination round
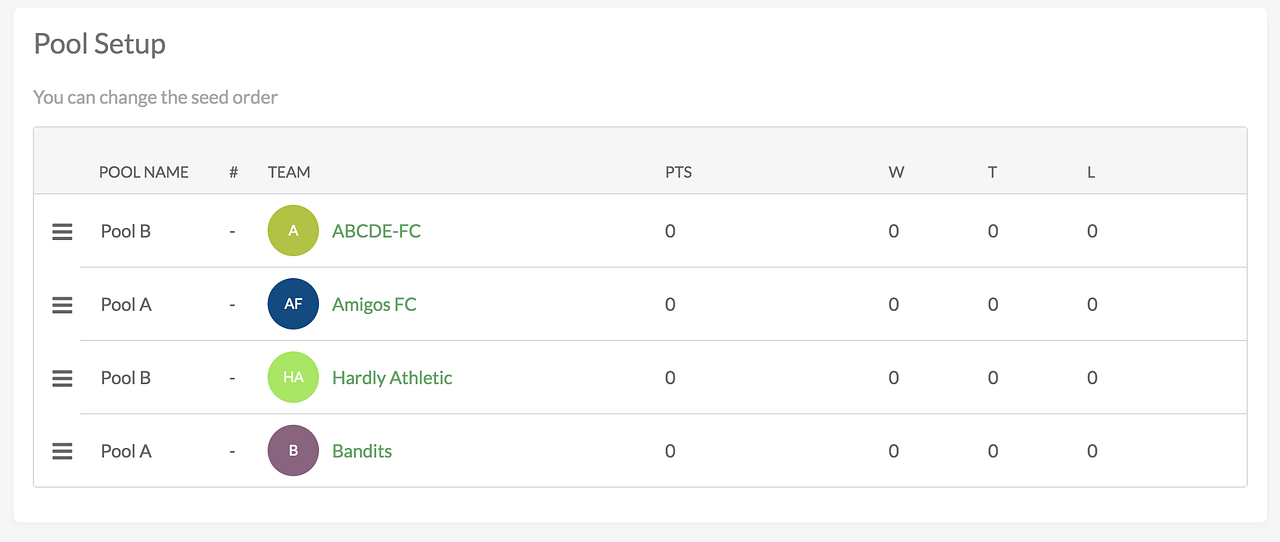
D) Pool Setup
You can change the seed order by dragging and dropping the teams into the order you’d like.
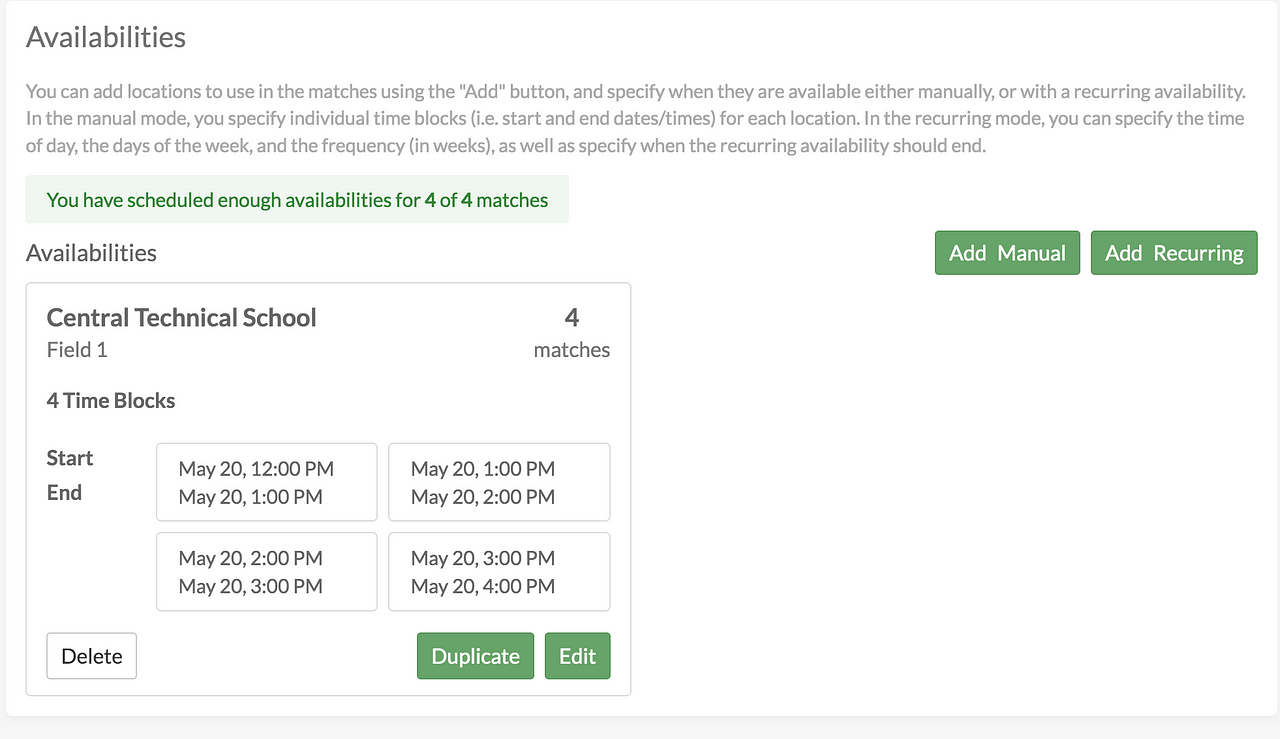
E) Availabilities
Based on the number of teams, and match durations, the OpenSports system automatically calculates the total number of matches for the elimination round. In this step, you need to specify enough available time slots for all these matches so the OpenSports system can automatically assign each match to an available time at a facility.
There are two options: specifying available time slots manually or setting up a recurring schedule. For this tutorial, we’ll add time slots manually.
- Tap the “Add” button and select “Manually”
- Optional — specify a pool
- Specify Facility and Resource(s) — For example, Central Tech, Field 1 &2.
- Specify the available time slots for that location and it’s “bookable resources (fields/courts/rinks, etc)”
- Tap on “Create Availabilities for [X] Matches”.
- Repeat steps 1–5 as necessary until you have created enough available time slots for all your pools and matches.
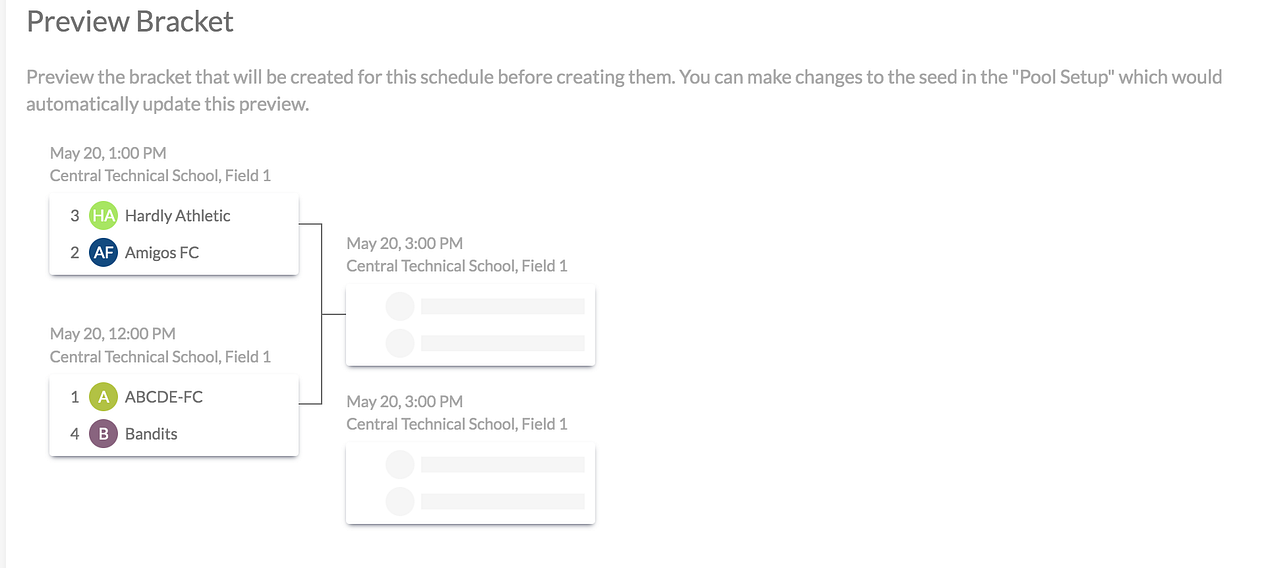
F) Preview Bracket
Preview the bracket that will be created for this schedule before creating them. You can make changes to the seed in the “Pool Setup” which would automatically update this preview.
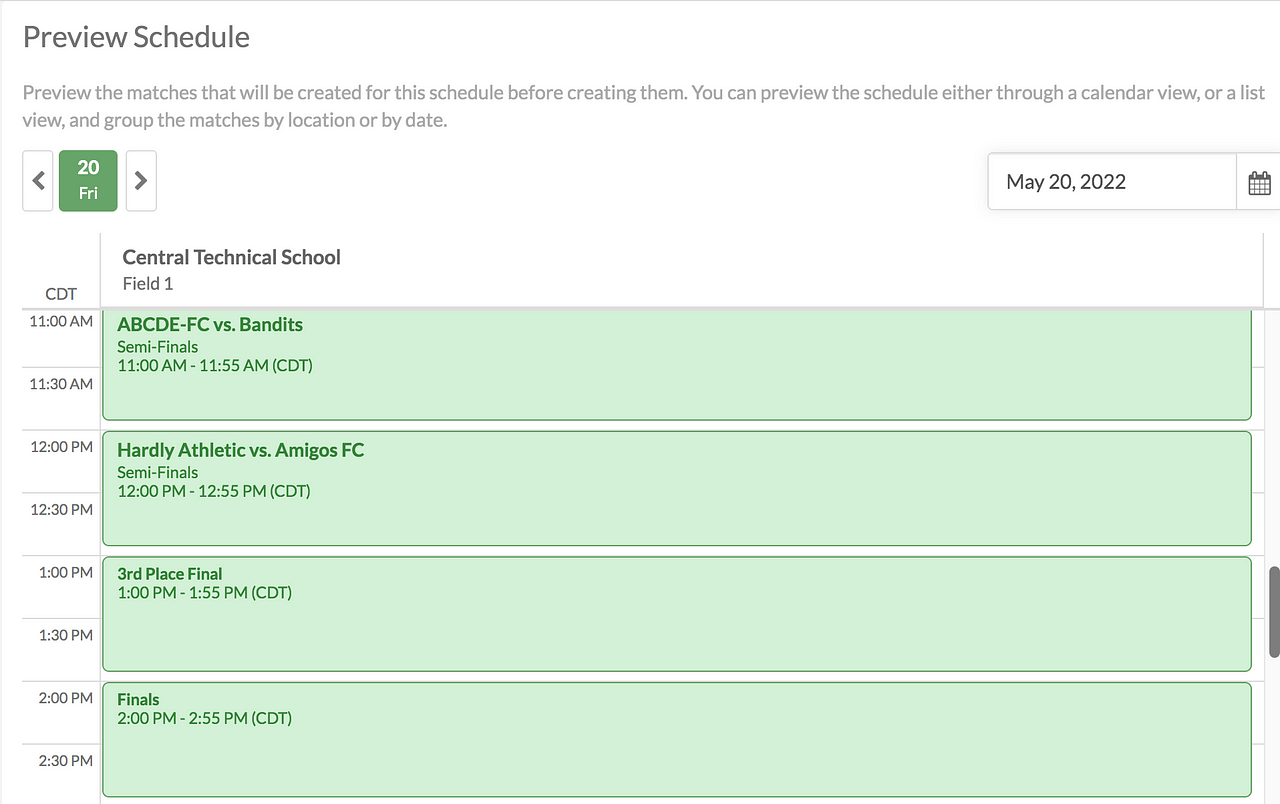
G) Preview Schedule
Preview the matches that will be created for this schedule before creating them. You can preview the schedule either through a calendar view, or a list view, and group the matches by location or by date.
H) Save Elimination Schedule (Unpublished)
Click Create Elimination schedule and voila! You will be brought to the list view of the matches.
- You can easily make edits here.

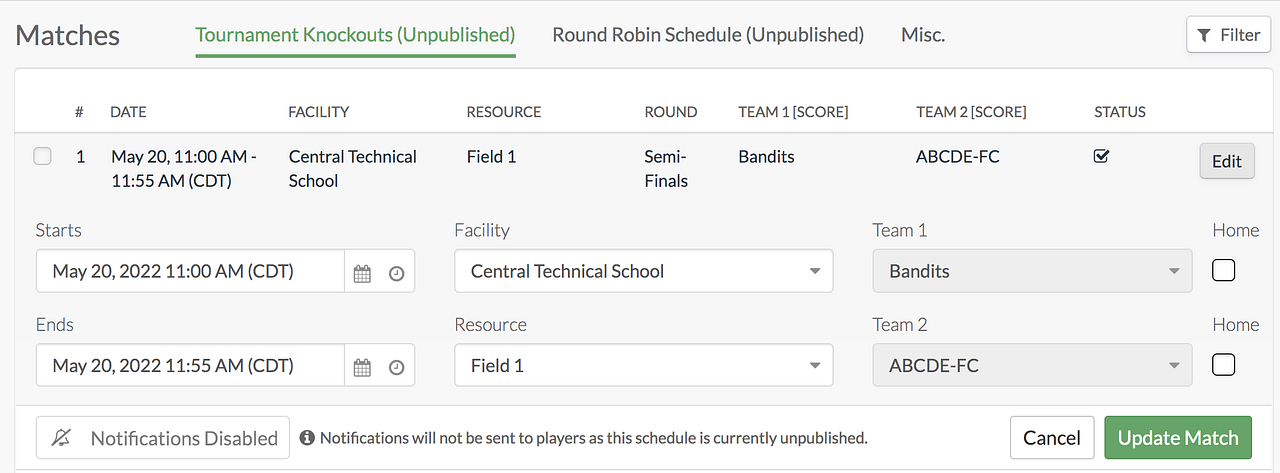
I) Edit matches (& make bulk edits)
Once the schedule is published, the admin can still make edits to specific matches, or to matches in bulk, and notifications will be automatically sent to players (e.g. if match times are changed) if you enable notifications for those specific changes.
- To view the whole list of matches, simply click on Matches from the navigation bar.
- On the Matches page, you’ll see the list of all matches sorted by date.
- Click on the Edit button in the match row to replace, switch, or modify teams, or change the date/time/location/field for a specific match.
- Click on multiple checkboxes to activate the Bulk Edit button and make the same changes to multiple matches at the same time.
- To view and edit additional match details such as the roster, or assign a ref to a match, tap anywhere in the match listing row
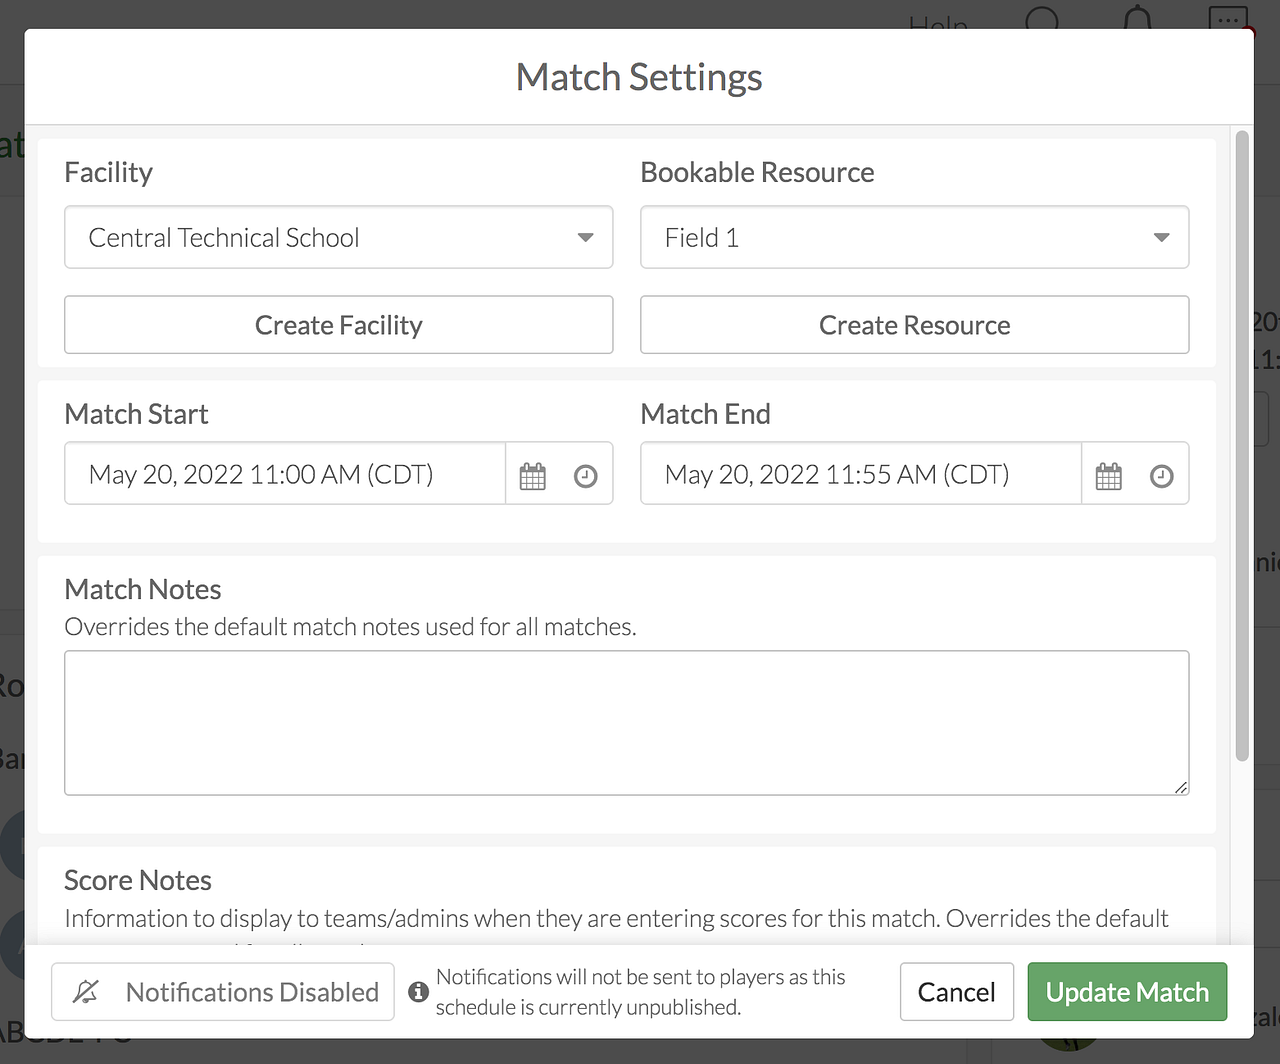
- To make edits to match details, click on the Edit icon to the right of “Details”
- You can view the players on each team’s roster, as well as if they have RSVP’d for the match, and you can check them in through this page
- You can assign a ref to the match by searching for their name in the Staff List search bar and clicking Add when their name comes up.

- If you click on the Edit button under Match details, here’s what you can edit:
J) Publish schedule
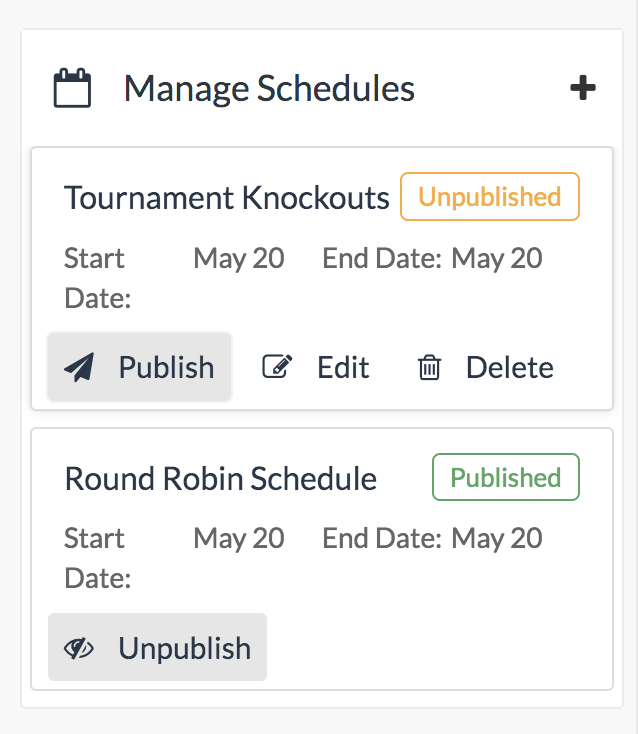
- When you’re happy with your schedule of matches, navigate back to the league Home page, and tap “Publish” under Tournament Knockouts (or however you named this elimination schedule).
- Once the schedule is published, all registered players will receive a notification to check out their new match schedule
And you’re done!
Congratulations on publishing a tournament knockout rount!
There’s a tonne more features that we didn’t cover in this tutorial (RSVPs, checkins, match reminders, score-keeping, etc.) and you can check those out in our other guides at www.opensports.net/help under the League Admins tab!
Don’t hesitate to reach our if you have any questions on how the OpenSports Leagues/Tournaments can be set up for your organization.
Questions? Send them our way: support@opensports.net