Introduction
This article is the first part of a three-part how-to series to help you get started with OpenSports tournaments.
In this article, we’ll walk you step-by-step through
Part 1) Setting up your tournament which includes:
(i) creating your first tournament; (ii) adding registration options; and (iii) inviting players to the tournament.
In the next articles, we will walk you through: Part 2) Setting up a Round Robin schedule and Part 3) Setting up an Elimination Bracket.
Let’s get started!
1. Create a group & connect to Stripe
If you already have a group on OpenSports, skip this step.
A) Log in to your admin user account and create a new group
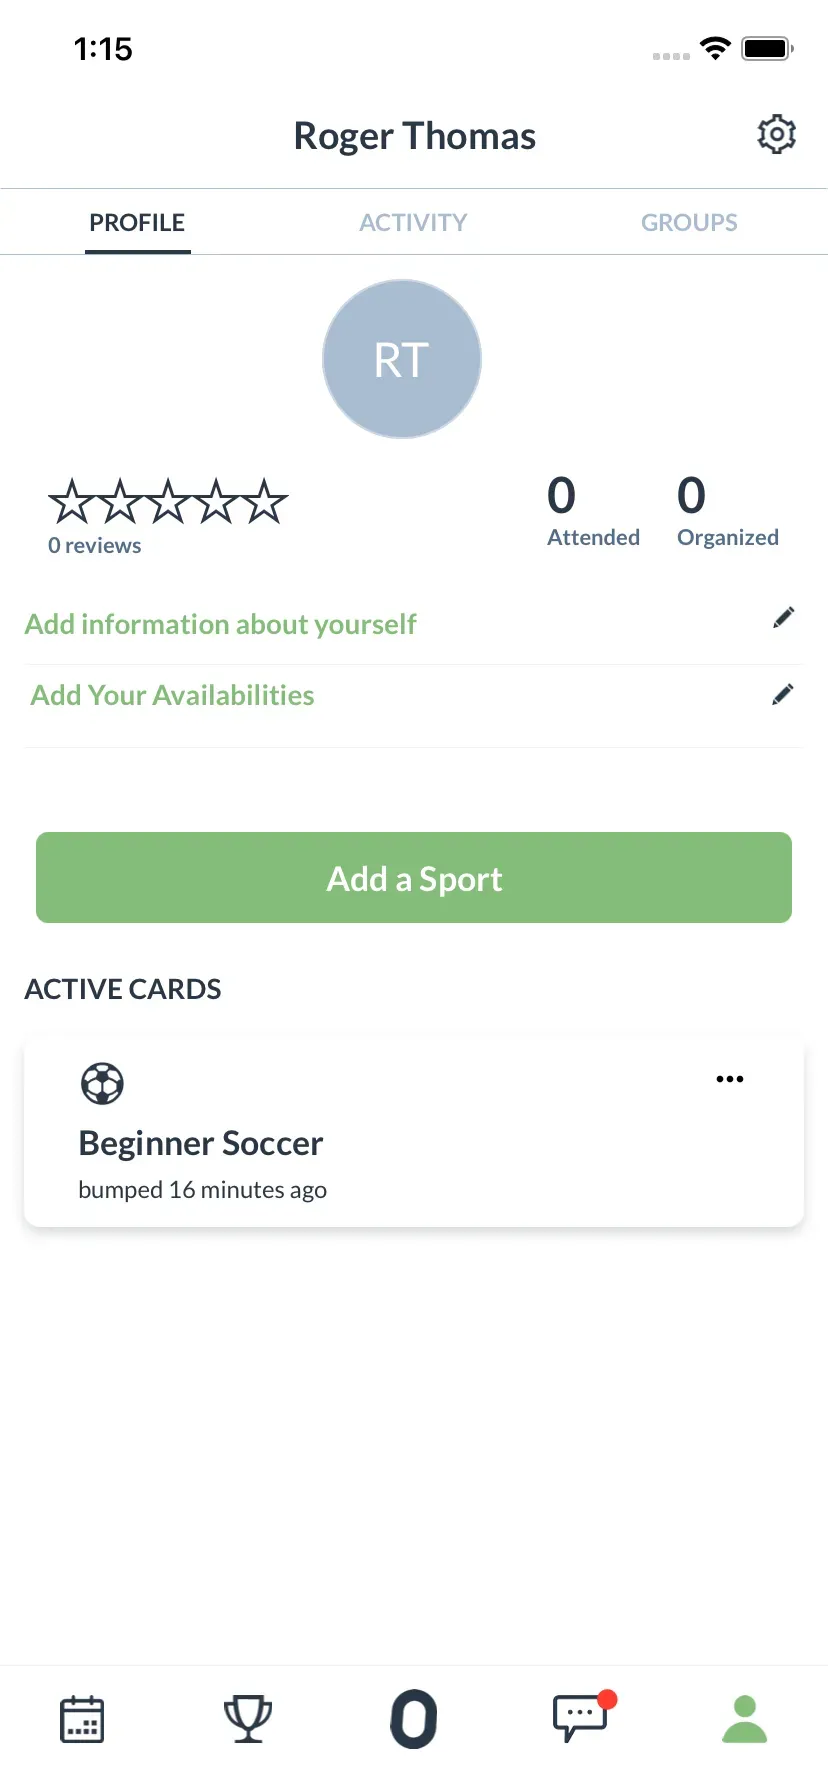
- Navigate to the profile page by tapping the “Person” icon in the main navigation bar (bottom right corner of page).
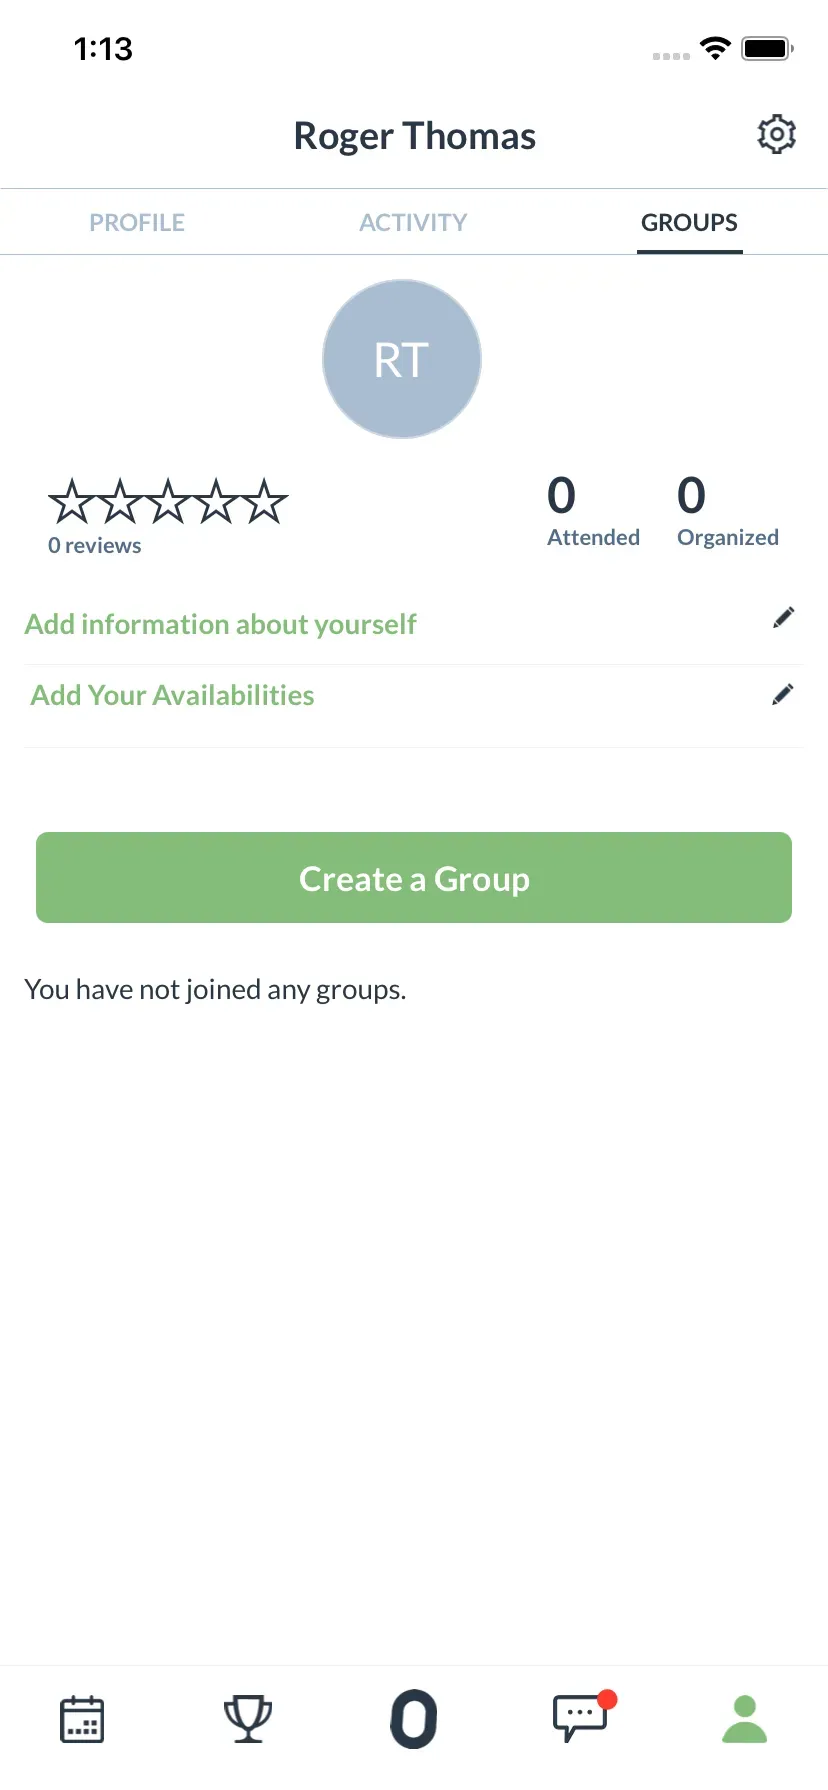
- Tap on the “Groups” menu (top of page).
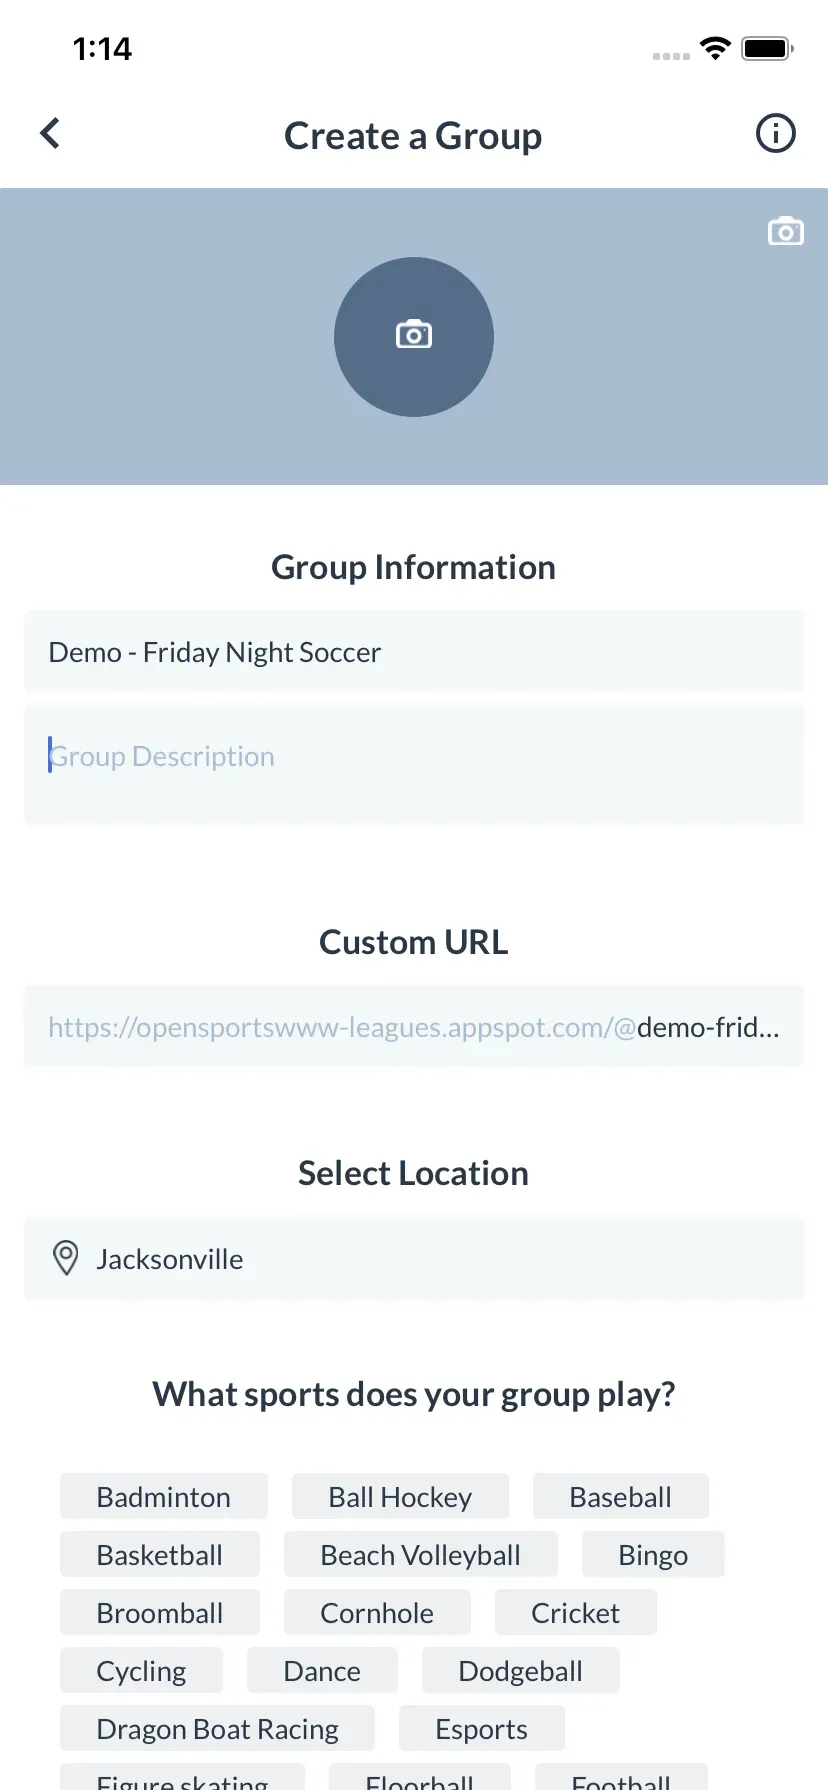
- Enter a name and location for the new group. A location is required as it will dictate the primary time zone used for the tournament (e.g. registration dates/times).
- Tap “Create” to create the group.
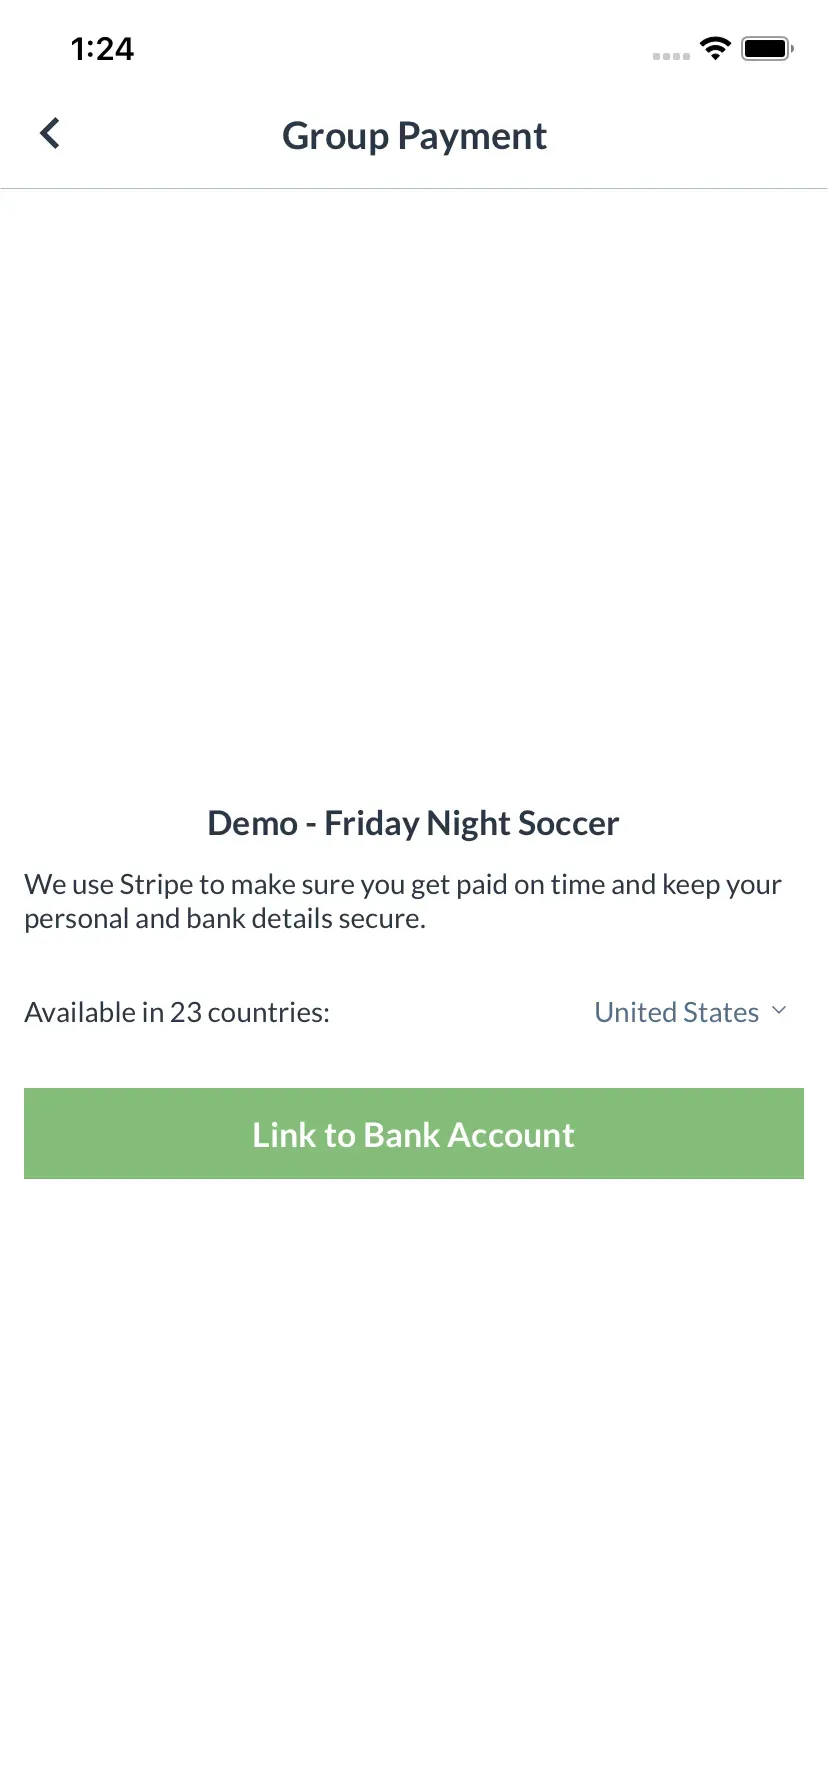
B) Set up payment details (Stripe account)
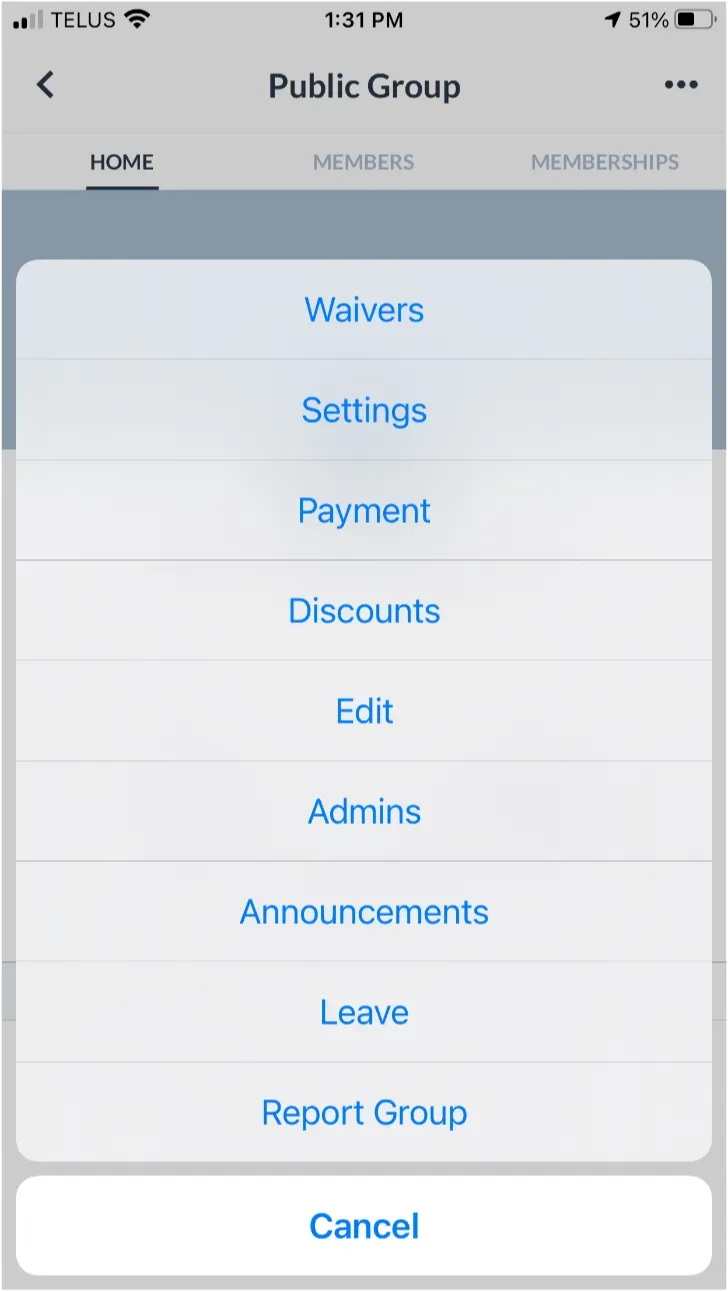
- From the homepage of the new Group, tap on the ellipsis (…) in the top right corner and select “Payment”.
- On the next page, tap on “Link to Bank Account”.
- You’ll be taken to a Stripe page. Fill out the simple form and you’ll be ready to collect payment for your tournament!
2. Creating your first tournament
A) Getting started & select tournament type
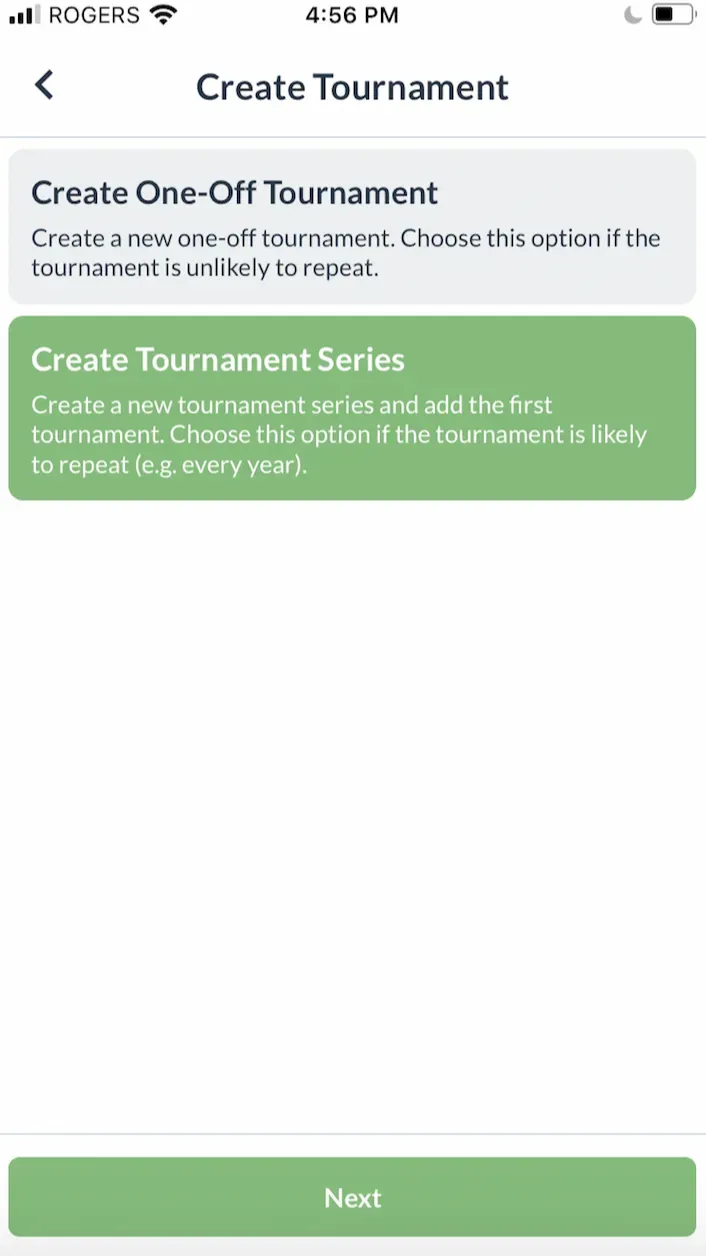
- Starting on your Group’s homepage, tap on “Create Tournament”.
- Select the type of tournament (one-off; or multi-series if it’s likely to repeat in the future).
- When setting up a tournament, ask yourself: Is this going to be a one-off standalone tournament that just happens once, or is it going to be part of a series of tournaments (i.e., an annual Labor Day tournament, or a quarterly tournament).
- The benefit of setting it up as a series is it will allow you to re-invite the teams that were in the previous iteration of the series, have similar settings, etc.

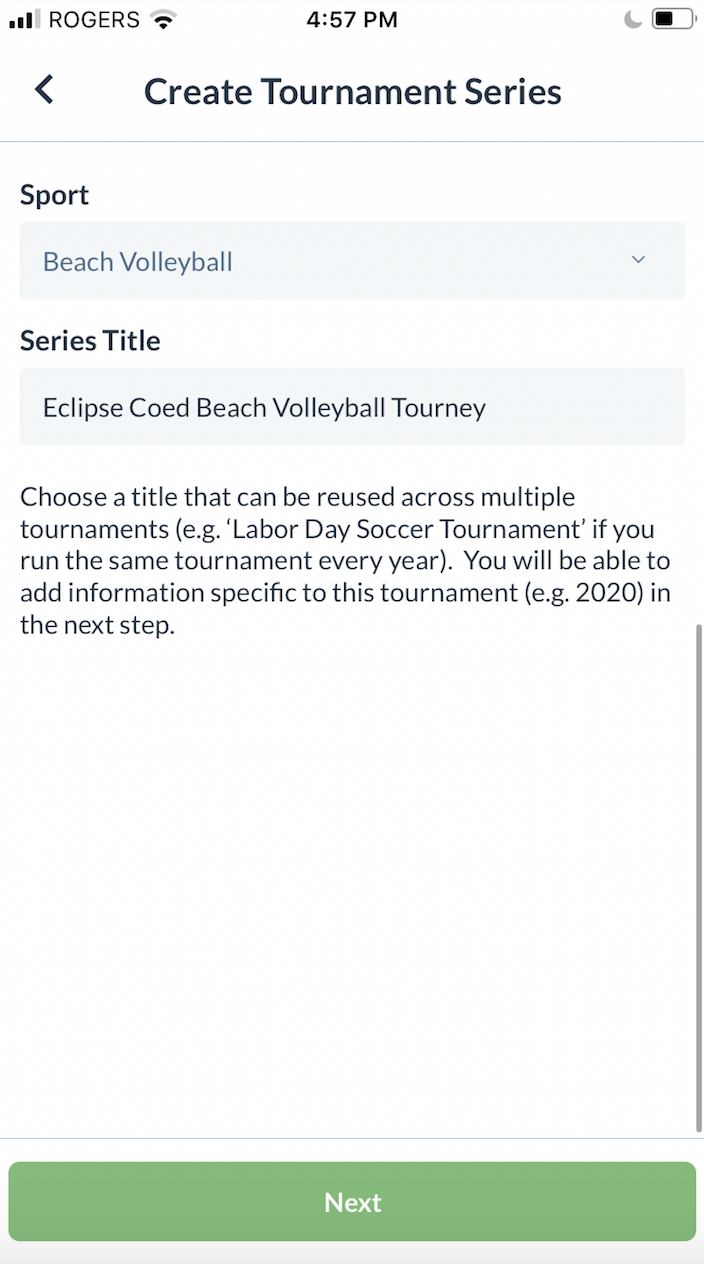
B) Tournament name & series title
- Select the sport
- If you are creating a tournament series, enter a name — this is the name you will select when you recreate the same tournament in the future.
- Note: In the next step, you can still edit the tournaments’ name to make it more specific.
C) Tournament details and pools
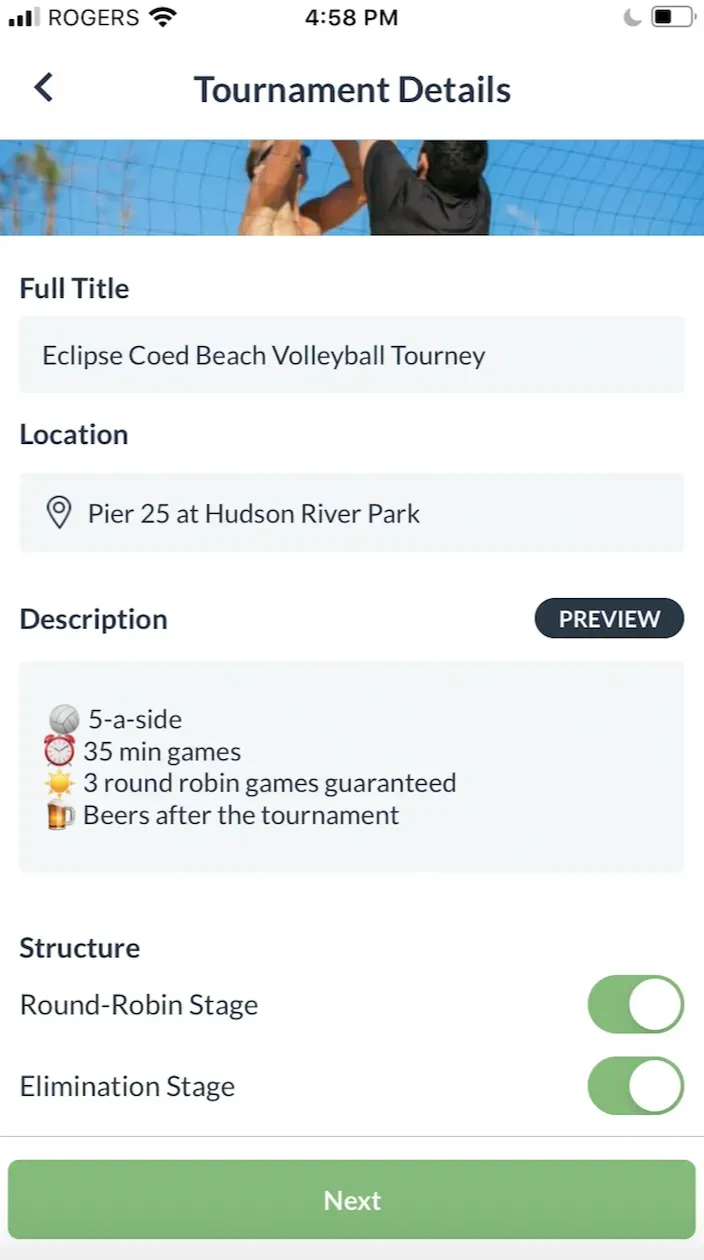
Fill out some information about the tournament:
- Full title — this will be used identify the tournament to potential players looking to join a tournament.
- Location — this is used by potential players to discover this tournament.
- Description — be creative and promote your tournament! This field is markdown enabled. (see https://www.markdownguide.org/cheat-sheet/ for more details on markdown).
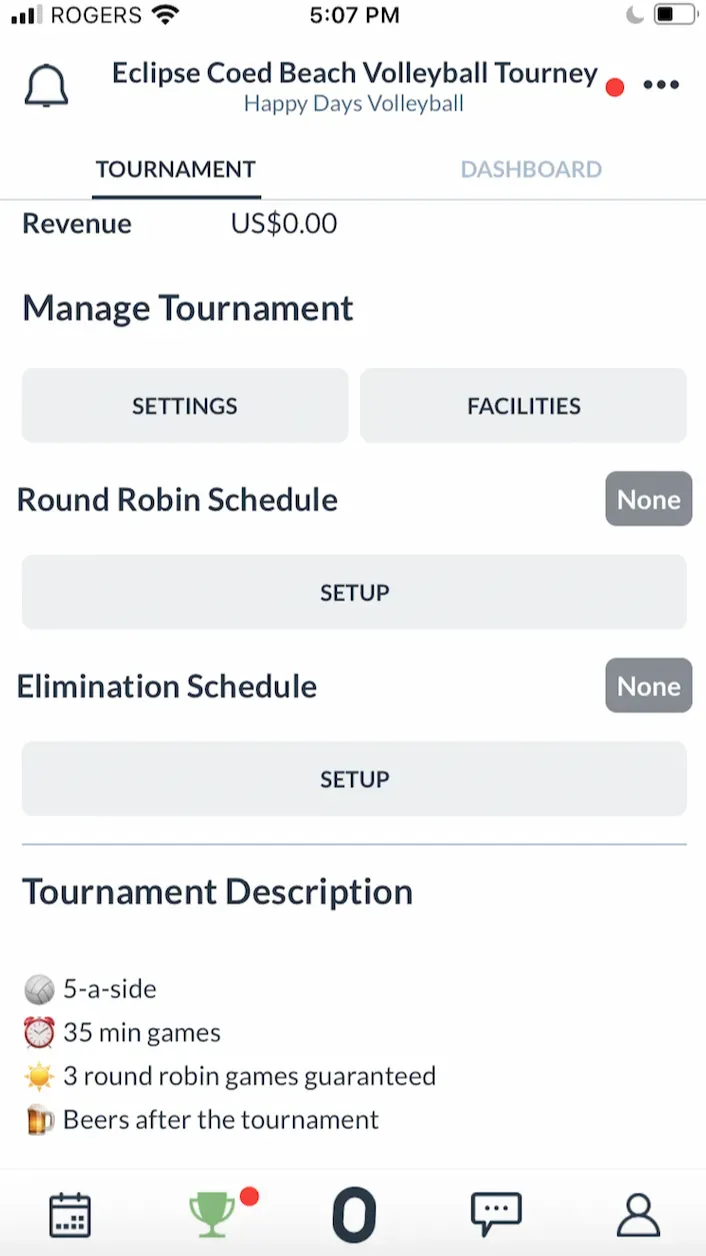
- Structure — OpenSports tournaments can have both a round-robin stage and an elimination (playoffs) stage, or just one of the two. Later on, you will be able to set up the schedules for the round robin stage, and knockout stage. We use the terms knockout / elimination bracket, synonymously.
- Youth tournament — additional security for youths by keeping their names hidden from other players.
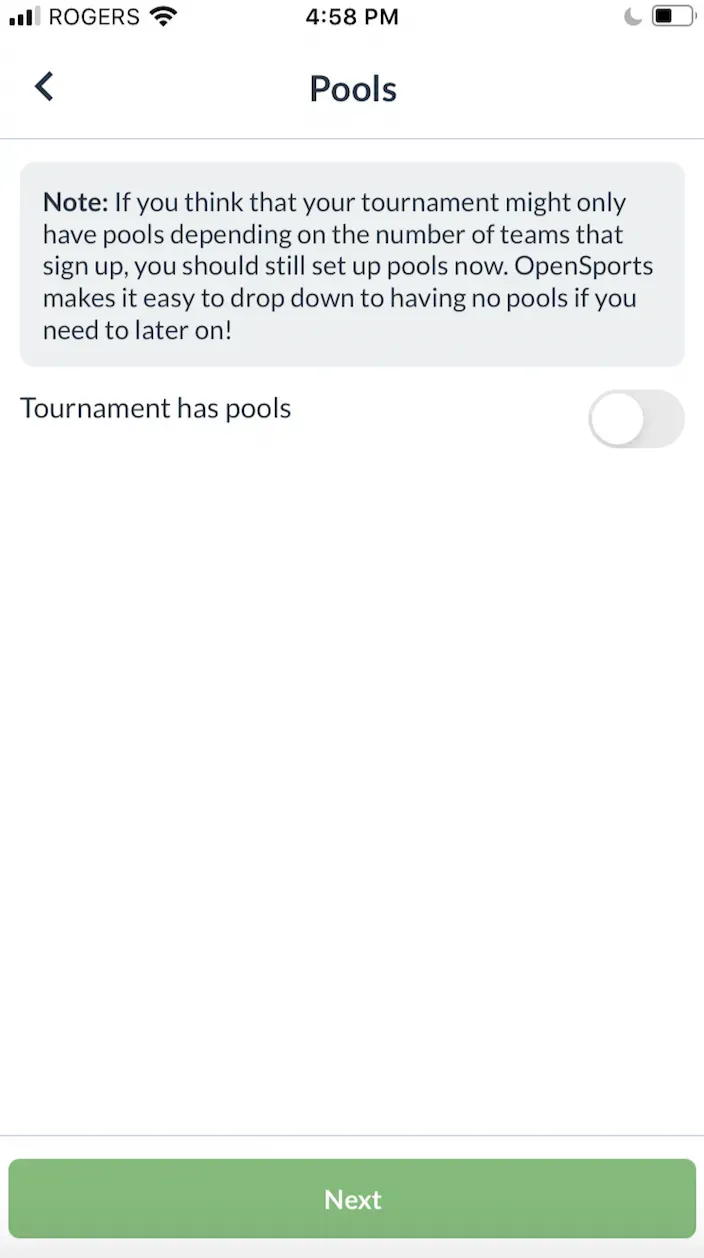
Then, Set up pools (Optional, but for this tutorial, toggle on Pools).
- If you are operating a large tournament, you can set up pools/divisions like Eastern and Western, or Pool A and Pool B.
- We will be increasing the amount of pools/divisions you can add in the near future.
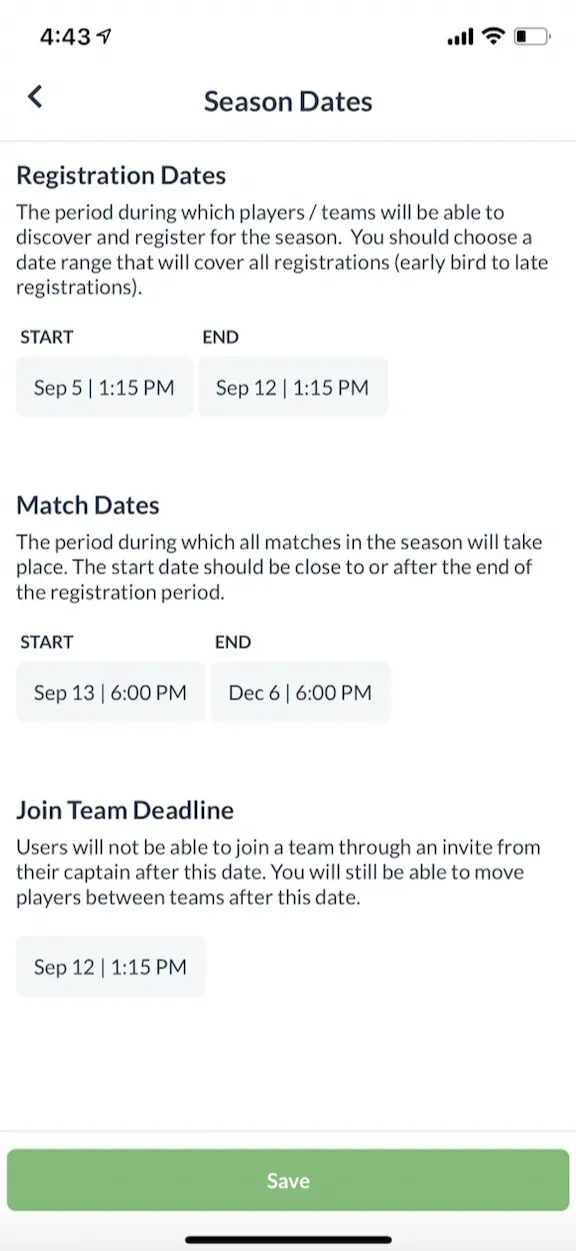
D) Key dates and registration settings
Set up Registration Dates and Match Dates
- Registration Dates — when people can register for the tournament. The date range should encompass all registration options (e.g. early bird and regular). For tournaments open to the public (e.g. not just members of your group), this tournament will only be discoverable by other OpenSports users during this date range.
- Down the line in the process to set up registration options, you will be able to create some tickets that have a shortened registration window (i.e., early bird)
- Match Dates — when all of the matches will occur.
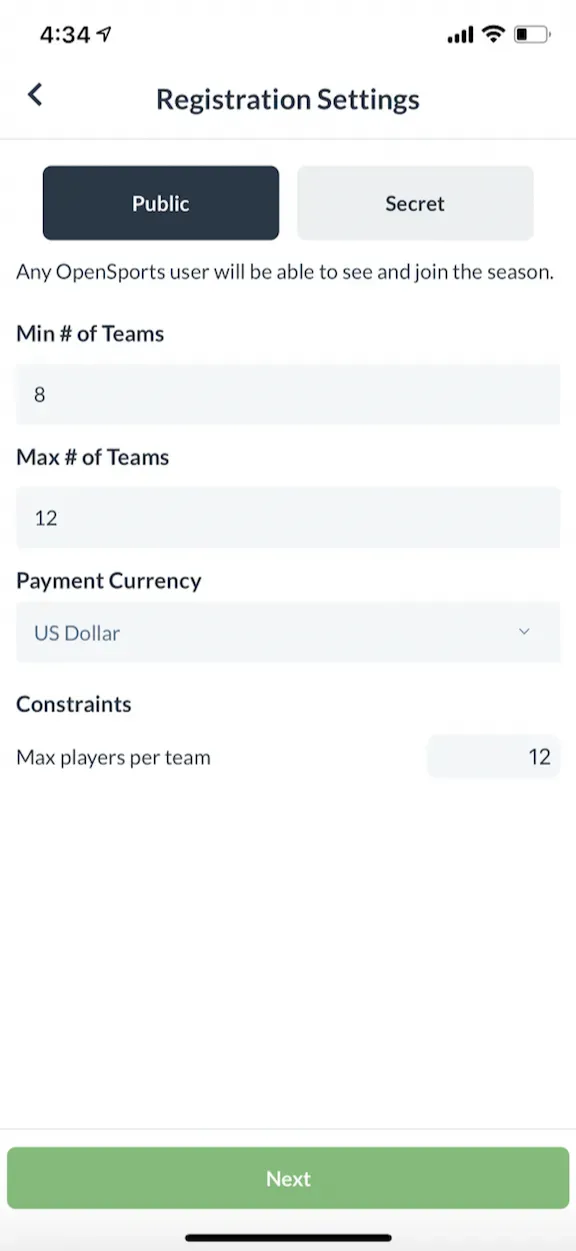
Registration Settings (This tutorial will use the defaults)
- Public vs. Secret — Public leagues will be discoverable and appear to your group members and OpenSports members at large. Secret leagues are not discoverable — even to members in your group — unless somebody has the link to the league.
- Min / max number of teams — The system will use this info about min and max # of teams to help you create team registration tickets (so that, for example if the min is 8 team tickets and the max is 16 team tickets, you can’t sell tickets for less than 8 teams or more than 16 teams)
- Payment currency
- Max players per team roster
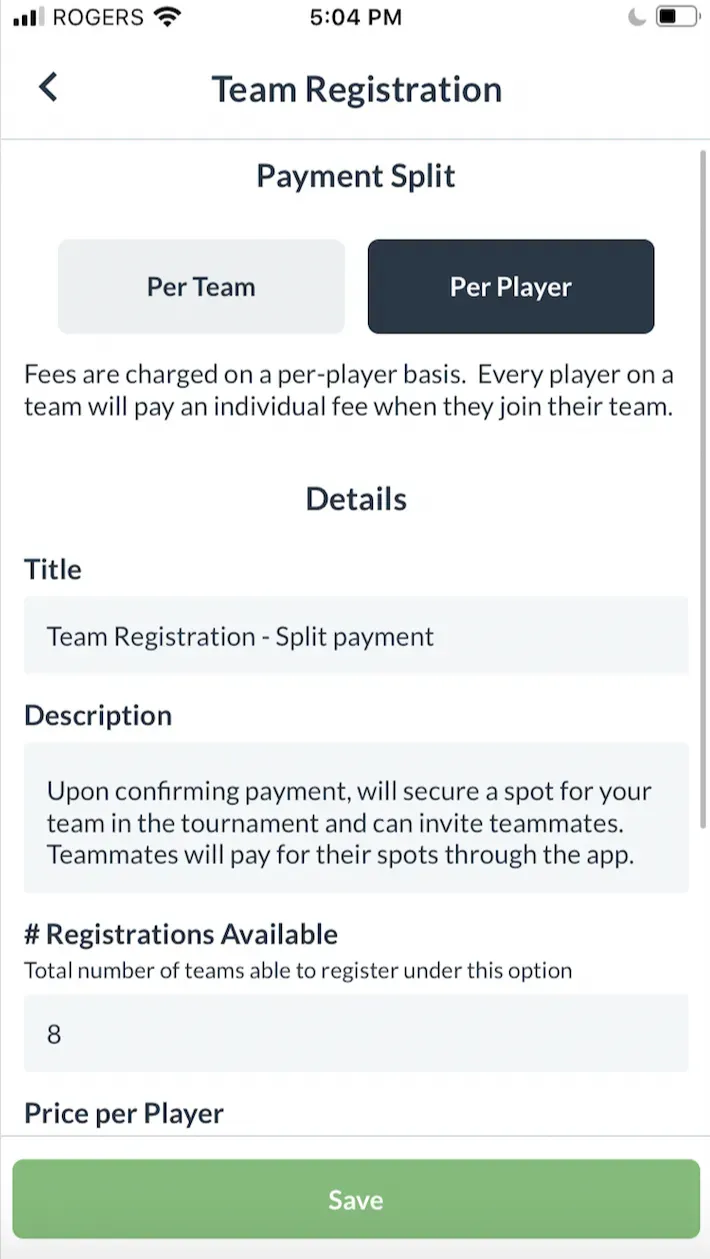
E) Add Registration Options — how players/teams will sign up
OpenSports offers a wide array of registration options. Two popular options are by Team or by Free Agent:
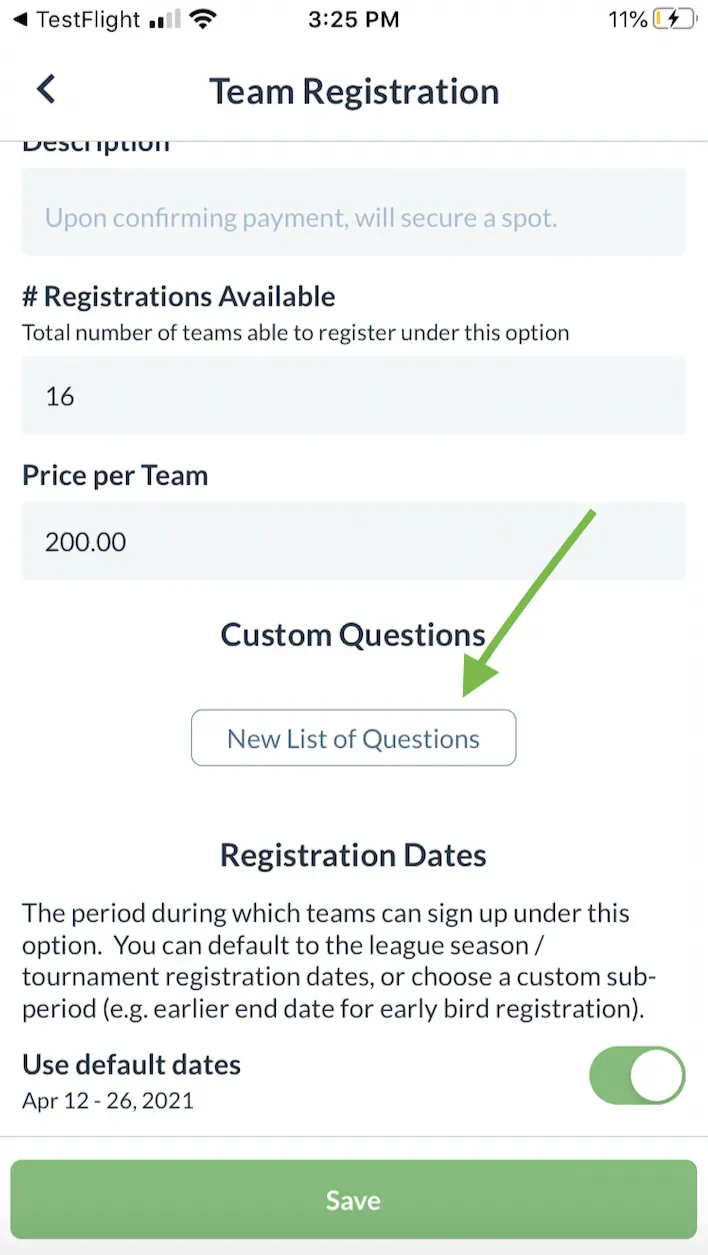
- Team Registrations — captains will sign up their team and players will join the team created by their captain. Payments for a team can be paid entirely by the captain when they sign up their team, or each player can pay a per-player flat fee when they join the team (aka “split payment”).
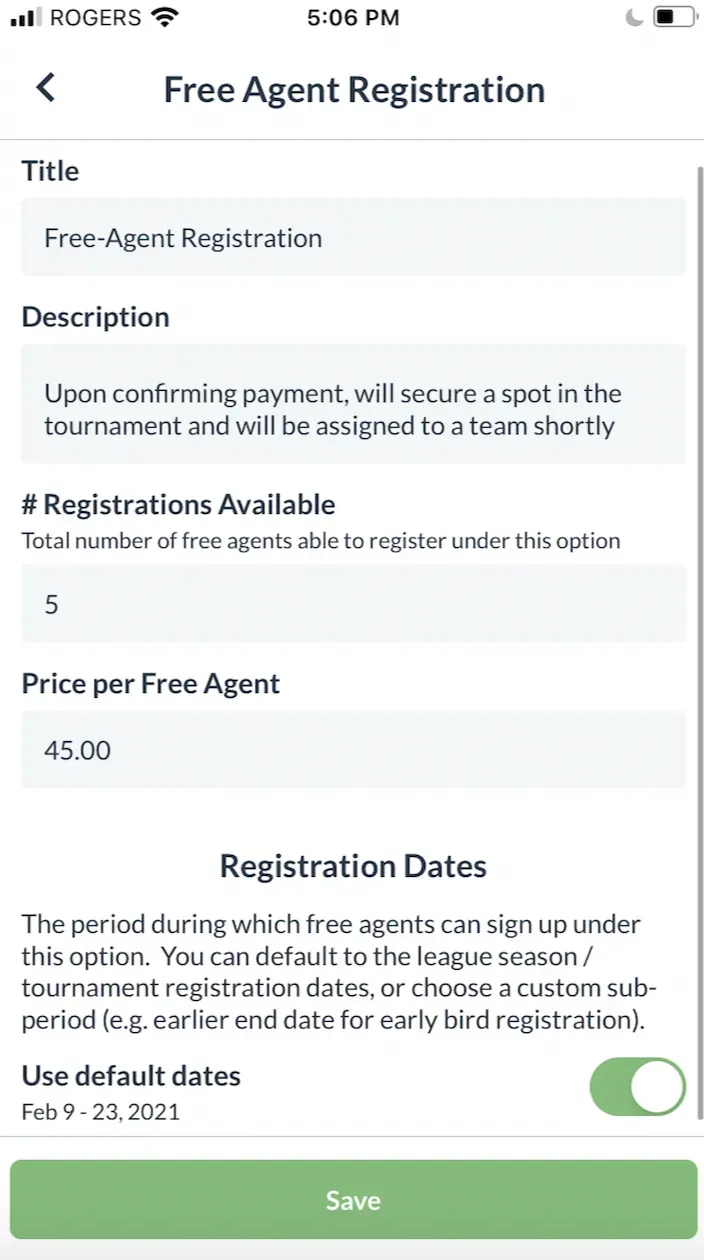
- Free Agent Registrations — players register as free agents, and the tournament admin can assign them to a team later on. This option is popular for tournaments where everybody registers as free agents and the tournament admin assigns everyone to teams manually. In this case, do not add any team registrations.
Custom registration dates
- By default, the registration dates for each option will follow the default registration dates set up in prior step; however, you have the option to modify the available registration dates here to offer early bird and mid-season registration options.
Secret Registration
- Set if you want a registration option to be secret (i.e., if you require somebody to have the link to buy the ticket). This is a great tool if you want to offer tickets to captains or free agents at a discounted price!
Custom Questions — if you would like captains & players to answer custom questions while they are registering as a player in your tournament
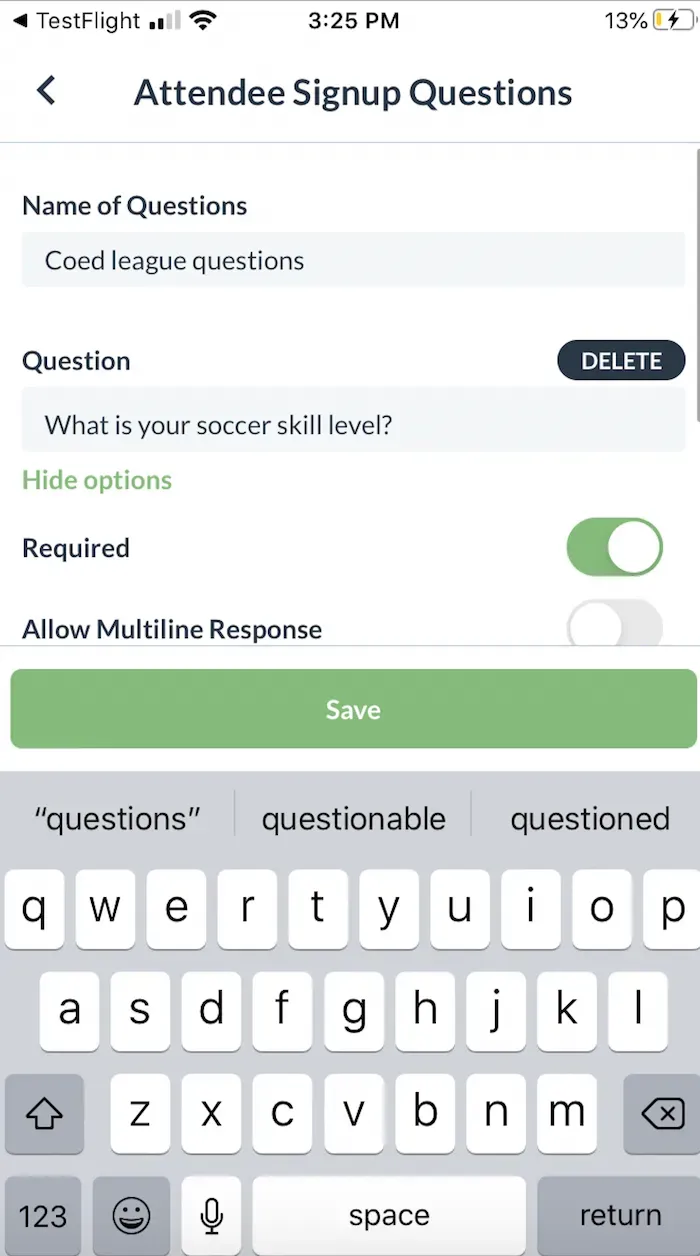
- Tap “New List of Questions” to start creating your custom questions, such as “what is your t-shirt size?”
- You can toggle on “Required” if you require for that question to be answered, and the min and max characters allowed in the answer
- Click on “Add New Question” if you would like multiple questions to apply to that registration
- Tap Save when you have added all the questions, and you will be able to preview the questions from the Team Registration set up page
- Review the info and tap “Save”
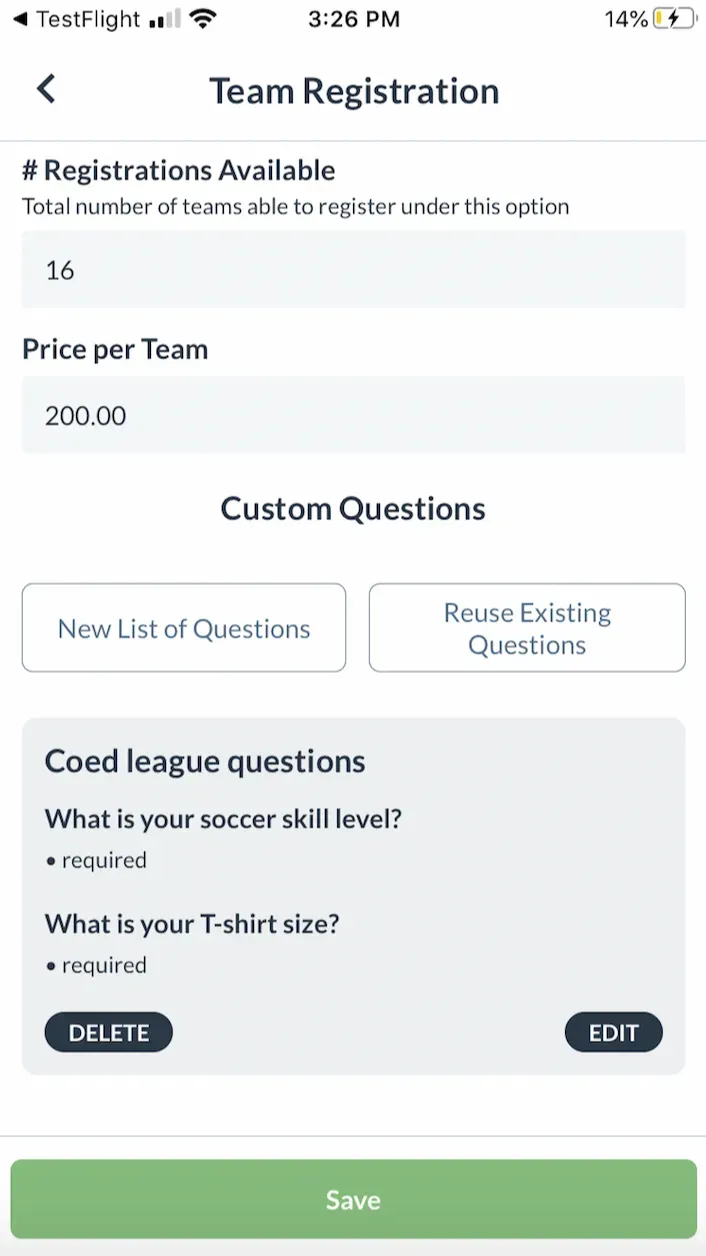
- Next, you can see a summary of the registration options you added
- Tap Add if you want to add additional registration options (i.e., split payment, free agents, early bird, mid-season registration… the options for registration types are endless!)
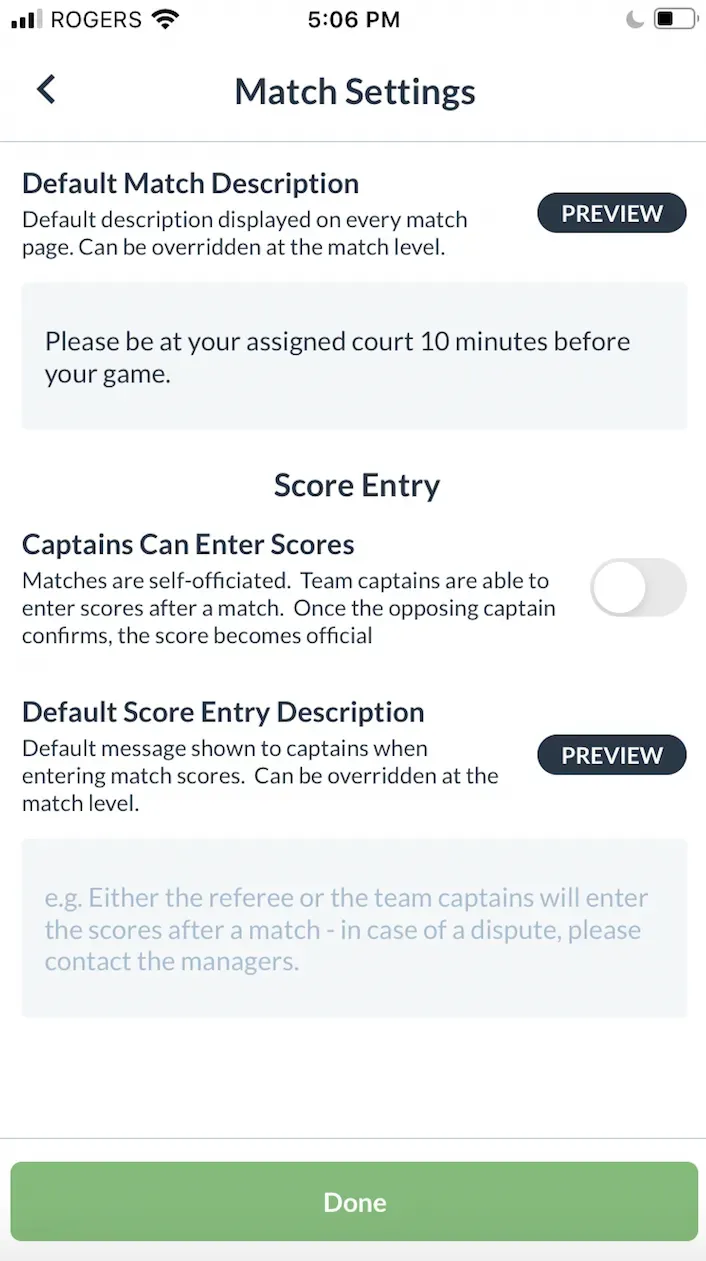
F) Match settings
- Enter a Default Match Description (optional).
- Under Score Entry, specify whether matches are self-officiated by toggling on Captains Can Enter Scores. If matches are self-officiated, captains will be able to enter the scores after each match, otherwise, only tournament admins will be able to enter scores.
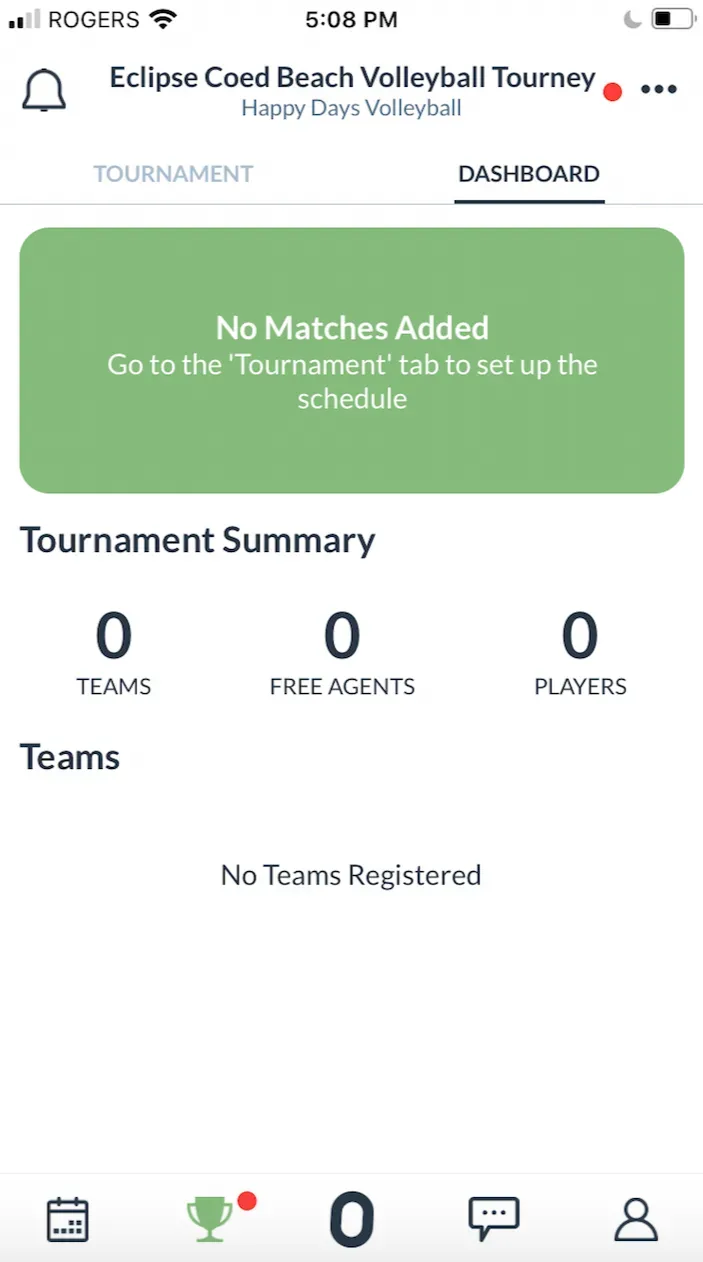
- Tap “Done” and confirm you wish to create the tournament.
- You will be re-directed to the Dashboard view.
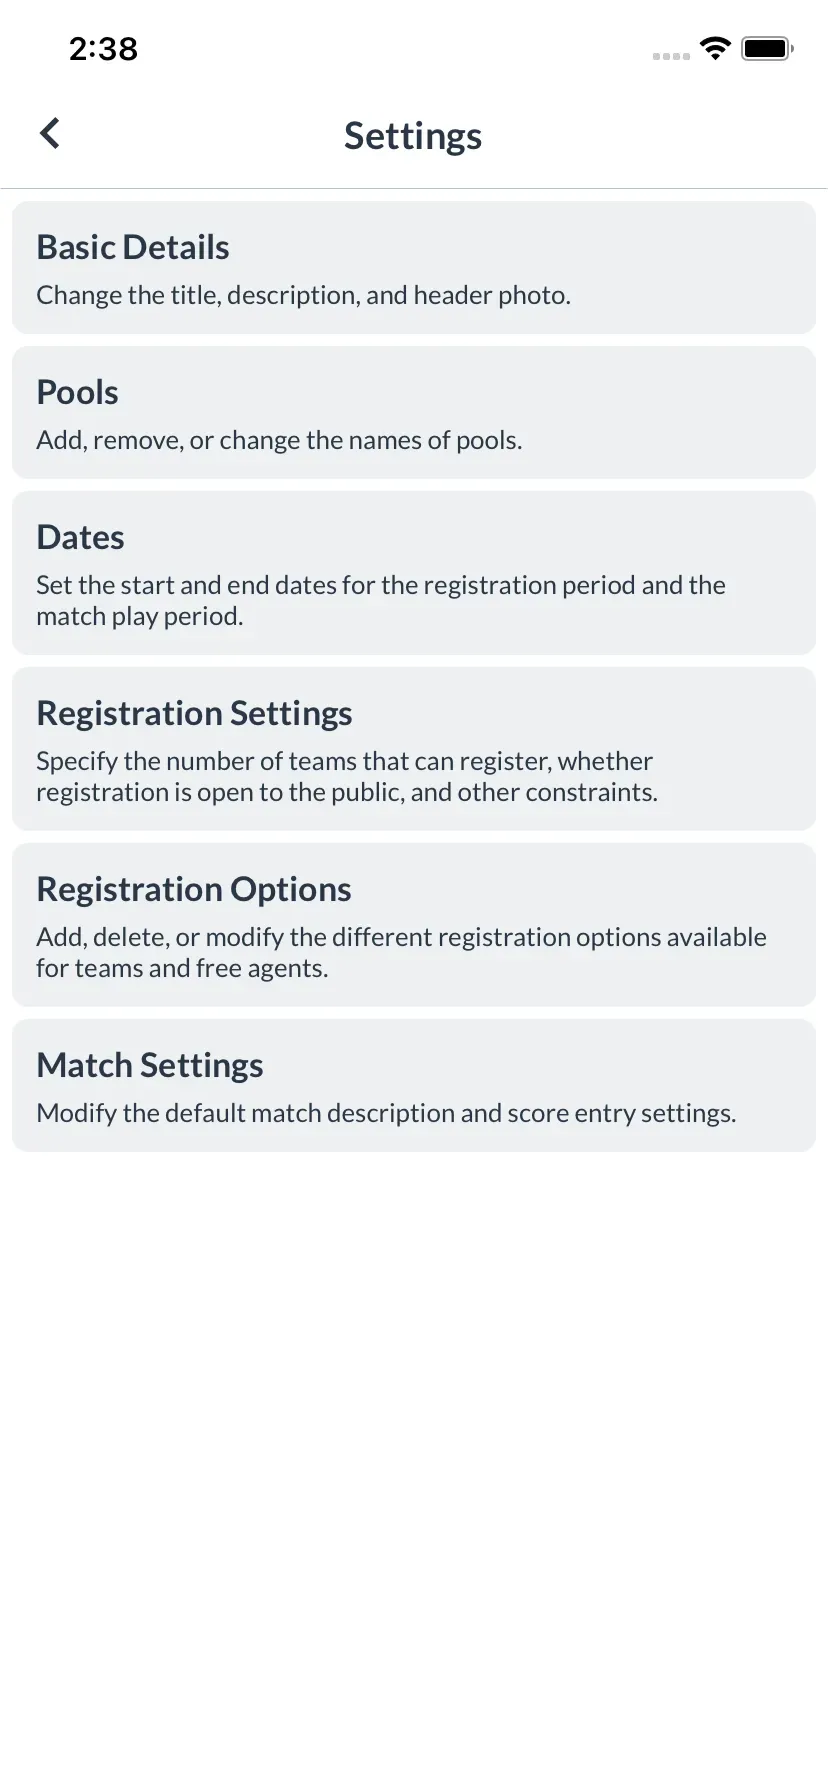
G) Edit tournament settings
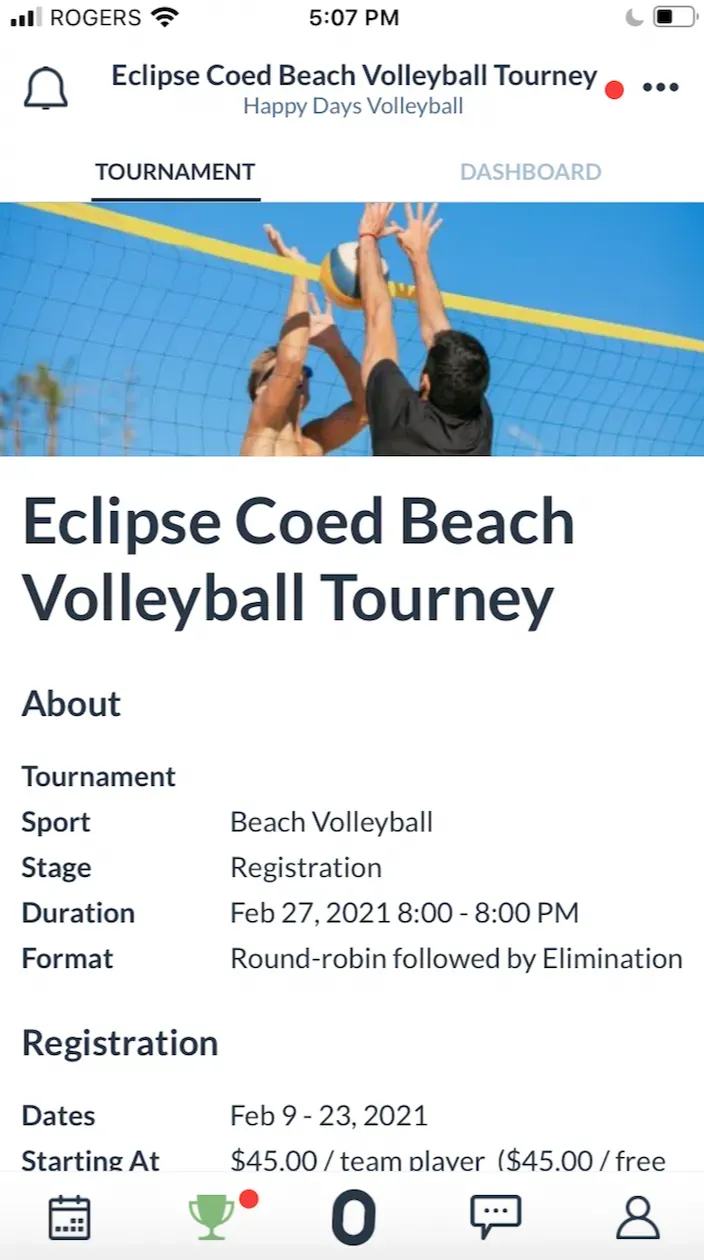
- Navigate to the “Tournament” submenu.
- Tap on “Settings” to edit many of the options we went through above.
H) Invite players
Let all of your club’s members know that registration is open and direct them to the OpenSports app (or your group’s web URL) so that captains and free agents can find and join the tournament.
- Only captains and free agents will register for the tournament through the team/free agent registration page.
- Once captains register their team, they can easily generate an invite link to send to their teammates to invite them to register for the team/tournament.
🍾🍾 Congrats!!! You have created your first tournament on OpenSports!!
To recap, in Part I of the tutorial, you’ve managed to create your first tournament and set up registration.
When you’re ready, move on to Part II, where we’ll continue by creating and publishing a schedule of round robin matches.
Then, in Part III, we’ll create and publish the tournament’s elimination bracket.
Woohoo! Any questions about setting up a tournament… send them our way!
Questions? Send them our way: support@opensports.net